Selecting Veggies
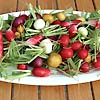
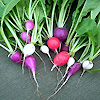
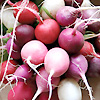
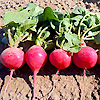
Radish Heirloom Mix
Growing/Eating
This plant is easy to grow and can be grown in all seasons. An excellent option to choose for garden planting. It prefers to flourish in rich, organic, loose soil. This characteristic of soil will help for good root formation. Avoid adding fresh manure as this will encourage lush foliage Dig up to ¼ deep, and sow seeds 1 ½ inch apart. Thin the plants to avoid shriveled and inedible roots and use the thinned for salads. This plant mature rapidly, so must be pulled before they pass their prime. Water moderately. If the soil gets too dry, radishes will lock up and become pithy and too hard to eat. If too wet, the roots will come apart and decay. These are fairly flavorsome for salads.
Harvesting
This plant matures very fast, so constant checking is needed. Do not leave radishes on the ground for too long otherwise end up failed for good harvest. The best way to know if radish is ready for harvest is to push back a little soil and see if the bulb has developed and then pick and taste a little. Pull Radish gently or dig around the roots to avoid bruising.
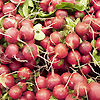
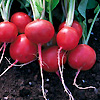
Radish Round Red
Growing/Eating
This is a premium veggie selection for gardeners who love very quick harvest. This plant grows best in full sun position, well-drained soil, and in loamy rich soil. Loosen the soil properly and dig up to .47 inches using trowel and sow the seeds with a spacing of at least 0.98 inches. Cover the seeds lightly with soil. Seeds usually sprout in three to seven days. Remember to water moderately during its growing season. Best when eaten raw or add in salads.
Harvesting
It matures speedily, and needs to be checked frequently for its coming maturity usually 3-4 weeks. Harvest can be done if roots are edible in size and must be completed promptly before it develops to pithiness, and heat and seed stalks occur. When roots are less than 1 inch in diameter, pull radishes. This is a sign that radishes are in usable size and relatively young. Store them well in the refrigerator once the tops have been removed.
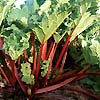
Rhubarb
Growing/Eating
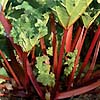
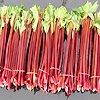
Great choice to grow for all season crops. Rhubarb is very easy to grow and can be left in the ground and will return a crop for many years (around 10 to 15 years). This plant best grow in full sun area, but can tolerate partial shade. It grows faster with a regular watering and occasional shovel with organic manure. All year round it is available, but during winter it grows more slowly and the stem is redder and thinner. Digging around and trimming the crown down will help the plant grow and produce nice thick stems. Do not eat the rhubarb leaves or roots as they contain oxalic acid which is poisonous. Rhubarbs can be used in a wide variety of dishes, jams, or simply eaten as it is.
Harvesting
When harvesting this plant, hold the base of the stem and gently pull them out. Do not harvest all the stems in one plant, to encourage next growth to the remaining stems. Remove leaf damage or injury visible with some black discoloration. Cut them off and make them compost. If the stem looks like soft and mushy, do not eat them.
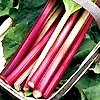
Rhubarb Mt Tamborine
Growing/Eating
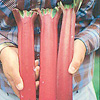
Rhubarb Tambourine is one of the best premium veggie choices to grow in garden. It prefers to grow in a full sun position and can grow in a neutral soil, yet organic matter such as manure or compost will provide nutrients and good soil and help the plant grow healthier. Remove all weeds as possible for this plant doesn't like to be troubled once established. Dig up to 60 cm or more; sow the seeds with an interval of 7cm. Don't let the soil gets dry, because it will interrupt the growth. Watering during dry periods may help the plants thrive. Flowering seed stalks will develop, cut them immediately to avoid reduction of leaf stalk. This will divert its energy into flower and seed production. Rhubarb leaves contain high level of oxalic acid which is toxic, this should not be eaten.
Harvesting
During the first season after planting, do not harvest. The nutrients produce by the leaves should be delivered back into the roots to guarantee a strong root system for stem production in the following years of growth. On the second season you can harvest lightly to avoid weakening the crown. During early cultivars, stem can be picked. To avoid rotting of the remaining stump, stems should be pulled rather than cut. Draw stems when they are about 23-30cm long. Grasp the base with your hand and pull it out gently. Take out less than one half of the total stem at any one time or you can harvest 3 to 4 stems at a time in every plant.
Rock Melon Minesotta Midget
Growing/Eating
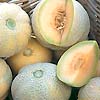
The best time to plant this crop is during Spring –Summer season and its best to be added in your gourmand selection. It grows best in full sun position, and in weakly acidic soil. This plant needs a minimal maintenance and care to grow productively. Dig up to 0.5 inches and sow the seed with a spacing of at least 58.0 cm. Always check to ensure a good germination. Water well until fruit situate. Fruit may be developed along the ground or up a support. Place a board to support the fruit that grows on the ground or pot to keep insects from destroying it.
Harvesting
If the fruit is already ripe and reaches its full size, then it is ready for harvest. Cut cantaloupe with cutters, avoid damaging the entire plant or the other fruits. Store them in the fridge for 6-9 days. Let the remaining unripe fruit develop and wait for its right timing to be harvested. Do not include the fruits that have been damaged by pets and insects, if possible discard them.
Rockmelon Ananas
Growing/Eating
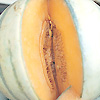
Ananas melon is lightly elongated with firm, netted or scaly, grayish-green, cream or buff rind. Excellent veggie selection to grow in gardens. It prefers light, well-draining soils classified as "sandy loams." It also needs to receive full sun all day long, or at least as long as possible. Place the seeds in wet paper towel before planting to help germinate and place them is a warm place. Keep the towel wet for a week or two until the seed begins to sprout. Place the sprouted seeds into a small planter filled with soil about 1-inch deep into the soil or plant out into garden directly. Allow the planter to get plenty of sunlight. Once the plant begins to grow, you can transfer the rock melon plat into the ground. Recommended spacing is 40 - 60 cm apart between each plant. Give the rock melon plants plenty of food and water and allow them to grow to maturity.
Harvesting
Fully ripe rock melons have a fragrant musky aroma and a delicate, distinctive sweetness reminiscent of the taste of pineapple. It usually takes 16 weeks to harvest. Indications that the fruit is fully ripe are changed in color from solid green to having a definite golden hue and the stem slipped off the melon by itself without pushing on it. Simply cut the stalks with a sharp knife or shears. Be careful not to drop the fruits when carrying it as they are semi-fragile.
Rockmelon French Charentais
Growing/Eating
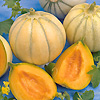
French Melon produces a big, round, sweet fruits about 1.3 kg/fruit. Ideal selection for planting gardens. The best location for gorwing French Charentais is fertile with free draining site. Ensure you have enough space in your garden and your plants will receive full sun light. Plant 2 seeds per hill in rows, allowing 1m space between each. Remember to water often to keep the moist of the soil. Add mulch if you left the vines in the ground. Rock melon is best in making fruit drinks and fruit salads.
Harvesting
Harvest in 85 days- 104 days. Tap on the fruit and listen for a dull thump to know if it's ripe already. When the surface color of the fruit turns dull and rind at the soil spot is toughen and will resist if dented with a fingernail, also a good indication that melons are for picking. When harvesting, make sure that the melon is cut from the vine instead of pulled.
Salsify Mammoth Sandwich Island
Growing/Eating
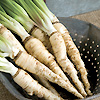
Salsify Mammoth is known as oyster vegetable because of its hints of shellfish flavour. You can count it as your gourmand choice to grow in your gardens. The seeds should be sown early in spring in deeply bed prepared much as any root vegetable and sows fairly close together (2") as it will yield longer straighter roots. Rows should be 12-18" apart. Keep seedbed moist. Water regularly and fertilize when 6” tall. Keep weed free. White root vegetable is excellent when baked, steamed or used in a gratin, also, tasty in soups and stews.
Harvesting
This veggie matures in 150-180 days. Pull or dig entire plant when root shoulder is 2.5cm across or slightly larger. Trim off the leaves and its ready to use. Place in plastic bags when storing in refrigerator.
Shallot Picador F1
Growing/Eating
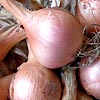
Picador F1 is excellent choice to plant as it has sweeter, milder, richer and more complex flavour than all other onions. Shallots can be grown from transplants started inside, direct-seeded, or from sets. Choose a well-drained, weed-free location. Raised beds are ideal for this. If planting from sets, plant them 7-15 cm apart with the root scar facing downward and the pointed end facing up. If direct seed 1/2- 3/4" apart in a 2-4" wide band, 50 seeds/ft., 1/2" deep, and rows 10-18" apart. Sown at this rate, from most seeds a single shallot will form; clusters will form if sown more thinly. Mulch to suppress weeds and retain moisture, and water weekly if weather is dry.
Harvesting
Harvest time is usually between 3-4 months. When the tops grow brown and falls over, then it's the best time to pull the onions out. Use a gardening fork and dig inch away from the onion bundles then lift them up. Leave them on the ground and let the sun dry them up. When the tops dried up and have papery or crispy skin, then it's time to place them in cool dry place. They can be stored for at least 6 months.
Silverbeet Five Colurs
Growing/Eating
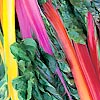
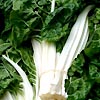
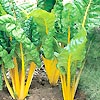
This wonderful plant will grow just about anywhere and can grow in all seasons. Best option to grow and will make your garden colorful as this is considered as ornamental plants. It has very mild and tasty flavour. Direct sow Leaf Beet seed outdoors. Grow Leaf Beet in a well prepared, moist, fertile seedbed in full sun or partial shade. Sow seeds thinly at a depth of 1cm in drills 30cm apart. Thin seedlings to 6-8cm apart for ‘baby leaves’ which will be ready to harvest approximately 50 days from sowing.
Harvesting
Start pinching the outer leaves as needed when plant is at least 10" tall, and let more leaves grow from the middle of the plant; or, if desired, harvest the whole plant, cut the base 2" above ground, and small heads will come again. Pick very young leaves, 2" - 3" to use fresh in salads.
Silverbeet Fordhook
Growing/Eating
Fordhook is a robust plant with white stalks and large, dark green leaves. A vigorous veggie that needs good drainage, fertile soil and plenty of space. Also suited to large pots. Plant in sunny position. Plant this gourmand selection thinly in drills 30-40cm apart and 12mm deep. Cover lightly, firm down and keep moist. Transplant or thin out when about 6-8cm high. Chard seeds often come in clusters of 2-3 seeds, so some thinning will be necessary. Mulch around plants in hot weather. Keep the plants well watered and harvest regularly, to keep producing leaves. Best lightly steamed and served with butter and herbs as side dish to roast meat or vegetable lasagna. Use in pies, steamed, stocks or stir fries. Soak the silver beet seeds a few hours before sowing.
Harvesting
If growing from seedlings, it usually takes 5-8 weeks after planting. Young leaves are nice picked for baby leaf salads. Larger leaves are nice lightly steamed and served with a roast, or added to omelets and quiches. Harvest young leaves regularly and remove flower stems as they appear. The more you harvest the more it produces.
Spinach Bloomsdale
Growing/Eating
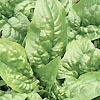
Best option when selecting green leafy vegetables to plant in home gardens or containers. Spinach Bloomsdale prefers to grow in a full sun position, fertile and with free-draining soil. Dig up to ½ inch and sow about 9-10 seeds per foot, 12-18 inches apart, since this plant has a moderate spread. Always look for its germination process and the need for waters. Maintain the soil moisture or add mulch. Floating row covers may help offer effective winter protection. Best for making green salads, side dressing's spinach or stir-fry.
Harvesting
Spinach can be harvested about six to seven weeks after planting the seeds. As soon as four weeks, baby leaves can be snipped off, but do not harvest more than half of the leaves in one plant. The perfect time to harvest them is when they are in full size but before bolting. Just below root attachment, cut them off. Or you can thin spinach plant every 3 inches once sprouted. This also encourages further growth. Wash before storing.
Spinach New Zealand - Warrigal Greens
Growing/Eating
This plant best grow in full sun position. Best selection to plant during spring season as this crop can withstand hot and dry summer weather. Soak seeds for one or two hours before planting for the outer skin is so hard. Dig a depth like three times the diameter of the seed with a spacing of 45-60 cm. Water the plant enough to sustain until it reaches its harvest period. Thinning encourages further growth of the leaves. Thinned pre-mature leaves can be used as a substitute for real spinach in cooking. New Zealand spinach must be blanched before eating due to its high levels of oxalic acid.
Harvesting
It taste like spinach and is used in the same ways. This plant can be harvested after 8-10 weeks from sowing. When the leaves reach its full size but not bolting, that's the best time to harvest them. Pre-mature leaves can be thinned and used. The leaves thought to be high in oxalates, blanch the leaves first for 30 minutes, and then rinse them with cold water before using them for salads or for cooking ingredient.
Spinach Perpetual
Growing/Eating
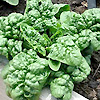
Best choice for all season crops planting. This plant prefers to grow in full sun position and in a fertile soil. Dig up to 1cm deep with a spacing of 50 cm apart. Look for its germination time. Don't worry if this plant appears too close, for this is tolerant to crowding. Let the plant get plenty of water to keep the leaves growing quickly. Cut the leaves that are being damaged by the insects. Thinning may help the leaves grow more. Whenever flowers occur, you can remove them to let the leaves grow healthier. Perpetual spinach is slightly coarser than regular spinach, but can be used in practically the same way.
Harvesting
Leaves can be picked as soon as it is large enough to harvest. The usual time frame is four to six weeks from planting. Do not let get the leaves much longer or bolting occurs. Few leaves can be taken in one plant but do not remove more than half in each. Or the whole plant can be cut down to three inches and let it grow again. Immature leaves can be picked off, they produce gentle flavor. This also encourages more growth.
Spring Onions Evergreen
Growing/Eating
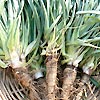
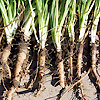
Best choice for planting as Spring Onions is cold tolerant and they can be grown in all seasons. Choose a sunny location, well drained, with good organic soil. Plant spring onions from sets or seeds. Growing from sets is the easiest way to grow onions, as you don't have to worry about germination, and actually start with a small bulb. If sowing from seed, plant one half inch deep in rows about three-four inches apart. When about two inches high, thin to one inch apart, and be sure to keep weed free. For continuous supply, plant successively. Spring Onions is perfect addition to salads and stir fries.
Harvesting
Harvest bunching onions as soon as they're large enough to eat about 9 weeks from planting. You can pick side shoots as per your needs or you can harvest them entirely. Pull gently from the soil then trim the roots and wash them. After washing, wrap loosely in plastic wrap and store in the refrigerator for up to one week.
Squash Gem
Growing/Eating
Squash Gem does best in a sunny spot in the garden with rich, composted soil. This variety is not frost tolerant and it needs a lot of space to grow. Best option to plant from spring to summer. Sow the seeds in rows 1m apart and 2 cm deep. Keep the soil moist, but not waterlogged as this will cause the seeds to rot. Mulching is not necessary as the large leaves of the squash plant provide similar protection from moisture loss. You can provide trellis to trail to keep the vines off from the ground and save some space.
Young gems can be baked whole in the oven or microwave but should be pierced before cooking. All sizes of gems are frequently cut in half and baked, broiled or grilled. Scoop out the seeds before cooking and the halves can be filled with cheeses, meats, creamed corn and spices. They have a sweet flavor, so cinnamon, nutmeg and sugar also are popular flavorings for gems. Gems also are boiled and mashed with flavorings and cheese.
Young gems can be baked whole in the oven or microwave but should be pierced before cooking. All sizes of gems are frequently cut in half and baked, broiled or grilled. Scoop out the seeds before cooking and the halves can be filled with cheeses, meats, creamed corn and spices. They have a sweet flavor, so cinnamon, nutmeg and sugar also are popular flavorings for gems. Gems also are boiled and mashed with flavorings and cheese.
Harvesting
Fruits can be harvested while still immature and before the rind has hardened too much. The fruit is ripe and ready to be picked when the skin is too hard to pierce with your fingernails. Pick fruits using a sharp knife and wash them after picking. Store them in cool dry place for up to 3 months.
Squash Jaune et Verte
Growing/Eating
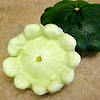
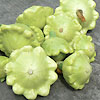
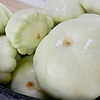
Squash Jaune et Verte fruits are bowl-shaped scallop, producing abundant yellowish cream flesh with wide bands of deep bright green. This gourmand selection is best to plant from Spring to Summer. Direct seed at about the frost free dates into rich, fertile soil with a sunny spot location. Usually sown in groups (hills) of 3-5 seeds and thinned to the 2 strongest plants. Plants may be started indoors in deep pots like paper pots and peat pots that can be set into the soil without disturbing the roots of the seedlings. Transplant at the 4 leaf stage. Keep the soil moist throughout the growing season. Young fruits are best for mashing, boiling, grilled, and the tender skin cooks to lime green.
Harvesting
You can pick fruits while it is still immature. The flesh is sweet and buttery when pick young. Pick continuously when fruits are just large enough to use. Use a knife or shears to avoid damaging the vines.
Squash Spaghetti
Growing/Eating
Spaghetti squash grows best in full sun and in soil that contains organic matter, such as compost. Best option to grow for summer harvest. Start spaghetti squash seedlings indoors and transplant them outside. Dig a hole slightly larger than the root of the plant. Carefully arrange the plant in the hole and fill in with soil. Alternatively, sow spaghetti squash seeds outside, 3-4 seeds per hill, 1 inch deep, leaving about 15-20 inches of space between each seed. Water the plants or seeds immediately after planting. Keep the area thoroughly weeded and well watered to maintain moisture. Spaghetti squash can be baked whole or cut into halves, filled with cheeses and spices, then cook them in oven.
Harvesting
You will know your squash is ready to pick when the stem starts to crack. The rinds will also harden it cannot be dented with a fingernail and increase in color. Cut the spaghetti squash from the vine using a sharp pair of gardening shears. Store the squash in a cool, dry place.
Strawberry Alinta
Growing/Eating
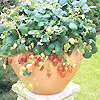
The ideal spot for growing strawberries is in full sun, in well-drained soil. Excellent choice to grow when planting in garden beds, pots or hanging baskets. Frequent watering is required in plants that grow in pots and baskets. When planting in beds, have 30cm space between each plant. To get them growing, remove grass and weeds then enrich the soil with generous shovelfuls of well-rotted manure or compost. Surround them with a 5cm layer of straw or sugarcane mulch. This keeps their roots cool and moist, and also keeps future fruit away from direct soil contact. Remove runners from the main plant to encourage continuous fruiting. Keep a watchful eye for slugs, snails and birds. Strawberry fruits can be eaten straight from the plant and it's good for making jams, pies, cakes and adding it into fruit salads.
Harvesting
Strawberries are their sweetest when fully ripened on the plants. Pick fruits when their color turns from green to red. Twist or use scissors to cut the leaving small stalks attach the fruits to avoid early rotting or damage to keep for longer in the fridge.
Strawberry Kunawase
Growing/Eating
Prefer planting strawberries in full sun, fertile and well-drained soil. Excellent selection for garden planting, baskets and pots. When planting in beds, have 30cm space between each plant and 30 inches. Apply liquid fertilizer once the plants begin to flower. To get them growing, be sure to remove grass and weeds then enrich the soil with generous shovelfuls of well-rotted manure or compost. Surround them with a 5cm layer of straw or sugarcane mulch. This keeps their roots cool and moist, and also keeps future fruit away from direct soil contact.
Snip off the runners from the vines to encourage continuous fruiting. Keep a watchful eye for slugs, snails and birds. Remove from the plants berries showing rot, sunburn, insect injury, or other defects. Strawberry fruits can be eaten straight from the plant and it's good for making jams, pies, cakes and adding it into fruit salads.
Snip off the runners from the vines to encourage continuous fruiting. Keep a watchful eye for slugs, snails and birds. Remove from the plants berries showing rot, sunburn, insect injury, or other defects. Strawberry fruits can be eaten straight from the plant and it's good for making jams, pies, cakes and adding it into fruit salads.
Harvesting
Start picking the fruit when they are deep red in colour and there are no patches of green still on it. Strawberries bruise easily. Be gentle when pulling them from the plants. Snap the stem directly above the berry rather than pulling on the berry itself. Keep harvested berries in a cool, shady location.
Strawberry Temptation
Growing/Eating
Choose a fertile and well-drained and has full sun site. When planting in beds, have 30cm space between each plant. Strawberry can also be grown in containers or pots and in baskets. Remove grass and weeds then enrich the soil with generous shovelfuls of well-rotted manure or compost. Surround them with a 5cm layer of straw or sugarcane mulch to help keep their roots cool and moist, and also keeps future fruit away from direct soil contact. Remove runners from the main plant to encourage continuous fruiting. Keep a watchful eye for slugs, snails and birds. Strawberry fruits can be eaten straight from the plant and it's good for making jams, pies, cakes and adding it into fruit salads. Strawberry temptation is indeed one of the best strawberry selections you must have.
Harvesting
Grasp the stem just above the berry between the forefinger and the thumbnail and pull with a slight twisting motion. Leave one-half inch from the berry, and half inch from the stem. Carefully place - don't throw - the fruit into your containers.
Sugar Beet
Growing/Eating
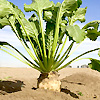
Sugar beets do well in fertile, well-drained soil and a sunny site position. Spread a 1-inch layer of compost onto the planting area with a shovel or rake one month before you plant your seeds. Till the soil with the compost to medium depth and pick out any rocks you see in the soil because it can inhibit the roots' growth. Plant sugar beet seeds about 1½ inches deep in the soil. Don't plant them too close to each other, as the roots can get intertwined.
Allow the sugar beet plants to grow until they sprout between four to six leaves. Thin the rows to one plant every 10 to 12 inches apart. Space rows 18 to 24 inches apart. Keep the soil moist by watering adequately. Keep them weeded and when weeding around the beets, be careful, as the roots of the sugar beets are shallow and you can easily damage them. Sugar beets are primarily used for their sucrose. Sugar beet pulp are usually processed into high a high fiber food additive and used in breakfast cereals. Beverages can also be made from beets.
Allow the sugar beet plants to grow until they sprout between four to six leaves. Thin the rows to one plant every 10 to 12 inches apart. Space rows 18 to 24 inches apart. Keep the soil moist by watering adequately. Keep them weeded and when weeding around the beets, be careful, as the roots of the sugar beets are shallow and you can easily damage them. Sugar beets are primarily used for their sucrose. Sugar beet pulp are usually processed into high a high fiber food additive and used in breakfast cereals. Beverages can also be made from beets.
Harvesting
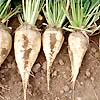
Harvest the sugar beets between 90 to 95 days after planting, once the green, leafy top above the ground is 12 to 18 inches tall and the beet roots measure about two inches in diameter. An early harvest is best to retain their sweet flavor. If the beets are allowed to grow larger, they'll become fibrous and lose their flavor.
Swede Laurentian
Growing/Eating
Laurentian has a deep purplish top and smooth root, yellow flesh. This gourmand selection performs well on wide range of soils, fertile and well drained. Loosen soil deeply or grow in raised beds to encourage good root development. Sow seeds 1”depth and transfer to their final location with spacing about 10cm apart. Keep weeded and water in dry weather otherwise they will not thrive, thin them out if necessary. Use floating row covers to protect crop from early pests. Swedes are great for fried or baked, will add flavor to your soups, stews and casseroles, the light yellow flesh cooks to a deep orange. You can also peel & cook then mash or puree.
Harvesting
You can pull the roots when they reach 10-15cm in diameter. It takes 11 weeks from plating to enjoy harvesting the crops. Trim the leaves but avoid bruising them or skinning for longer storage. They are tastier when use directly after harvesting.
Sweet Corn breakthrough F1
Growing/Eating
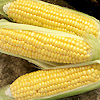
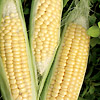
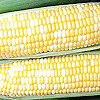
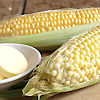
This type of corn produces 2-3, 18cm cobs per plant, each with 16-18 rows of bright yellow tender sweet kernels. This is twice sweet as the ordinary corns which make it best for your gourmand planting selection. Plant out seeds on the surface of a good free draining soil after all risk of frost 45cm apart in blocks to aid pollination. Cover seeds with a layer of compost or vermiculite, 1cm deep. Once the cobs start to form, water regularly. Check after three weeks from pollination to ensure the best harvest timing. It is best when boiled or can be cooked as vegetable.
Harvesting
The ears mature from 17 to 23 days after pollination. Cobs are ripe when the liquid of the grains is thin and creamy. Pull back husk to see if corn has reached desired stage of maturity. Remove fruits from the stem by twisting them in downward direction. You can store them and keeps its flavor for up to 10 days.
Sweet Corn Honey and Cream F1
Growing/Eating
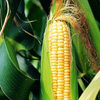
Excellent choice to plant during spring. Sweet corn honey needs a sunny, sheltered position and well-drained, compost-enriched soil. Grow corn in blocks of short rows rather than in a long, single row. Try for a seed spacing of at approx. 30cm apart and sow at a depth of around 1.95 inches if you plant straight from the seed. Remember to water often to keep the soil moist. A heavy mulch, 10 cm deep, of either straw or sugar mulch helps trap in the moisture during our long dry summer. Sweet corn can be eaten raw as it is super sweet variety, or can be eaten as a vegetable and it is also best for boiling and BBQ.
Harvesting
Picking usually starts about 90 days after planting, about three weeks after the silky tassels have appeared at the tops of the cobs and when the seeds start to turn pale yellow. Twist the cobs off the plants by snapping them downwards.
Sweet Corn True Gold
Growing/Eating
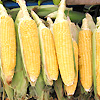
True gold sweet corn in an excellent variety to plant from spring to summer. Wonderfully delicious, large, 8 1/2 inch ears of golden kernelled nicely sweet corn. Sweet corn needs rich soil, full sun and adequate moisture to produce good ears. Balanced organic sources of all the major and minor nutrients are recommended so you must fertilize soil heavily with compost. Plant sweet corn 1-2" deep in rows that are 3' apart. Plant 2-3 seeds every 12". Corn needs regular watering - an inch a week. True Gold is ideal for eating raw straight from the garden but is also a good cooking as vegetables or as snacks.
Harvesting
Harvest in 80-90 days. To check if an ear is ripe, pull open the top of the husk and squeeze a kernel. If it is fat and spurts milky juice, it is ready. If it is dimpled and spurts watery juice, it's not yet ripe (just close up the husk). Twist the cobs off the plants by snapping them downwards.
Sweet Potato – Beauregard
Growing/Eating
An excellent potato crop selection for garden planting.Beauregard has large reddish tubers, have moist, deep orange flesh. Grow sweet potatoes in rich fertile, light sandy well drained soil for high yielding and resist cracking. Add plenty of well rotted manure or garden compost to the soil to improve its structure and fertility before planting. Sweet potatoes like a slightly acid soil and a site that receives full sunlight. Pot up sweet potato slips and grow them on in warm, frost free conditions until they are established. Plant sweet potatoes 30cm apart, leaving 75cm between rows. Water generously after planting. Don't water your sweet potatoes during the final 3-4 weeks prior to harvest, to keep the mature tubers from splitting. When growing sweet potato in cold areas they are best grown in greenhouse borders or under cloches. They can be boiled, baked, fried, made into chips, roasted, used in stews and can be used in a wide variety of dishes, both savoury and sweet.
Harvesting
Harvest roots in 4 months. You can dig your tubers once the foliage starts to yellow. If the foliage is hit by a frost, the tubers are probably still fine. Just don't let them sit in the ground too long after the tops die back. Be gentle when digging. Sweet potato tubers grow close to the surface. Their skins are tender and can be damaged and bruised easily. Harvest leaves throughout season.
Sweet Potato Hawaiian Sunshine
Growing/Eating
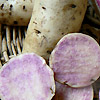
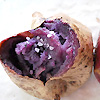
Hawaiian Sunshine is a vigorous plant that spreads its dark green heart-shaped or five-lobed leaves closely to the ground and produces large white-tubers range in color from purple to white or orange and is rich in antioxidants. It is an excellent selection to plant for large potato tubers harvest. Potato vines can be planted on top of hills or in flat ground with soil hilled around the plants at about 5 weeks after planting. When planting, pluck all leaves off except for three or four at the end, being careful to leave the leaf bud at the tip. The starchy, storage root (root-tuber) is eaten boiled, mashed, baked, or fried as chips. The leaves may be steamed, boiled or baked.
Harvesting
It takes 150 days from planting to collect the potatoes. When harvesting the sweet Hawaiian, dig carefully so as not to injure the potato. The tubers should be dried and cured in a protected place for a week after they are dug up. During this process, the carbohydrates turn towards sugar, sweetening the flavor of the potato.
