Selecting Veggies
Amaranth Autumn Palette
Growing/Eating
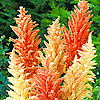
Pistachio-green and orange brown plumes appear summer to Autumn. Tall, unusual plants are ideal for textural background and filler. Grows 3-4 feet tall and it's very quick and easy to grow. It grows well in direct sun, and prefers medium levels of water. It is one of the best gourmand choices you can grow in your garden. Sow onto the surface of a good, free-draining, damp, seed compost and lightly cover the seed with fine grade vermiculite. It is adapted to chalk, clay loam, loam, peat, sandy clay, and sandy loam soils. Plumes can be used as a long-lasting and intriguing cut flower. The seeds can be used for breads, pastries, or can be popped like corn.
Harvesting
Allow seed heads to dry on plants. Grains can be easily harvested as the flowers begin to dry. If the ground is saturated from rain and a strong wind occurs late in the season, amaranth roots may partially give way and the plant will end up leaning, making harvest more difficult. Amaranth seeds may also start to shatter and fall to the ground if the crop is left standing too long, particularly after a frost has occurred.
Amaranthus
Growing/Eating
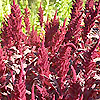
An excellent gourmand choice in growing home veggies. Amaranth grows vigorously, tolerates drought, heat, and pests, and adapts readily to a wide range of environments. Thinly sprinkle the seed on the ground and rake it in. Amaranth loves rich soil with steady moisture and a good supply of nutrients, especially nitrogen. The kind of amaranth grown for grain will not grow well in containers.
Use amaranth leaves in salads or anywhere you would use spinach. Amaranth as a grain is used similarly to cereal grains such as wheat and oats. The seeds can be popped, flaked, or ground into a flour to use for bread, crackers, cookies, breakfast cereal and other foods.
Harvesting
Cut the whole stem when it is between one and two feet tall, maybe six to ten inches above the ground. The stem will reshoot and you may harvest that again. For grain harvest, If you shake the flower heads and seeds start to fall out, then they are ready. Cut the seed heads just before they become dry and brittle. The seeds can be removed in several ways: by rubbing gently with your hands (wearing gloves is recommended), by enclosing the seed heads two clothes and trading on top without shoes on, by beating the seed heads inside of a bag, or by beating seed heads over a cloth.
Arugula
Growing/Eating
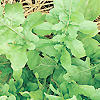
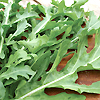
Arugula is one of those great, simple greens to grow at home. It is a premium choice for your garden. Sow the seeds in a sunny location in succession plantings, approximately every 20 to 30 days, from early spring to Autumn. Arugula performs best in spring to early summer. After that time, plant it under the shade of an "airy" tree, not dense shade, or under shade cloth. It is not fussy at all, although too much drought and summer heat will cause the leaves to be smaller and more peppery. This plant does go to "seed" fairly quickly. But use the flowers in your salads and collect seeds for future plantings. And if you make your "succession" plantings, then the new plants will be ready as the older plants are going to seed.
Harvesting
To harvest simply pick the young leaves and the plant will keep generating new ones for months. Older leaves are a bit tougher and hotter. The flowers are small, white with dark centers and can be used in the salad for a light piquant flavor.
Arugula Pronto
Growing/Eating
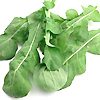
A premium choice of growing veggies in your home garden. Fast growing, large, tender, indented leaves have an upright habit. Arugula is an excellent candidate for micro-greens. Either indoors or outside in a garden bed, scatter seeds 1/8 - 1/4" apart and cover lightly with soil. Water gently and thoroughly, and make sure the soil never dries out. Sow every two weeks for a continuous crop spring through Autumn. Since you're growing these plants for young seedlings, make sure no other weeds pop up. Its mild peppery flavor is ideal in salads and sandwiches. Light cooking removes the heat of over mature leaves, wonderful addition to pasta sauces.
Harvesting
The best time to harvest micro-greens or arugula is when they develop their first set of true leaves, generally 10 - 20 days after sowing. Pick individual leaves and tops to encourage the plant to produce more leaves. Use a sharp knife or just twist leaves with your hand. Cut the whole plant right above the soil level before flowers appear.
Artichoke Purple
Growing/Eating
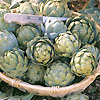
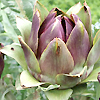
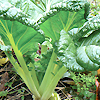
Best gourmand choice for your home garden. It grows to 1.4–2 m tall, with arching, deeply lobed, silvery, glucose-green leaves 50–82 cm long. It needs full sun and well-draining soil. If yours is a container garden, plant artichokes into 15-gallon nursery containers or very large decorative plastic or ceramic pots. These plants are accustomed to poor soils, so if you mulch with organic compost, you needn't fertilize. Enrich the soil with plenty of good compost. Adding a thick layer of mulch to protect them from frost helps with growing artichokes in colder climates.
When preparing, remove and discard the "hairy" choke, then dive into the hidden treasure known as the heart. Baby purple artichokes make a delicious appetizer when simmered in olive oil at a low temperature, then fried at a higher heat so their leaves open. Sprinkle them with fresh lemon juice and serve. You can peel the stems and cook along with the artichokes. Eat hot or chill and slice into salads or pasta dishes. Flowers can be dried and used in arrangements.
When preparing, remove and discard the "hairy" choke, then dive into the hidden treasure known as the heart. Baby purple artichokes make a delicious appetizer when simmered in olive oil at a low temperature, then fried at a higher heat so their leaves open. Sprinkle them with fresh lemon juice and serve. You can peel the stems and cook along with the artichokes. Eat hot or chill and slice into salads or pasta dishes. Flowers can be dried and used in arrangements.
Harvesting
To harvest, simply cut a stalk at the nearest branching point. Cut the bud from the stem about 1" - 1½" inches below the bud base using a sharp knife. Handle buds carefully during harvest to avoid bruising bud leaves.
Asian Greens Tokyo Bekana
Growing/Eating
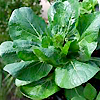
Tokyo Bekana is a great gourmand selection for those gardeners who want to harvest right after few weeks. It's a fast-growing, mustard-type green, good for cool-season planting, but quick to bolt in heat. It has large, collard-like leaves, but more delicate, somewhere between spinach and collards in texture. Sow seeds in well prepared beds and cover them lightly with soil. Thin baby leaves for salad and allow the remainder to grow to maturity. Transplant at 12"–18" apart. Asian Green leaves are very vulnerable to caterpillars, slugs and snails. You can use Iron Phosphate pellets or floating row cover to control them. It is best used for steaming, stir-frying, boiling in a small amount of water, or added to soups and can be eaten in raw salads.
Harvesting
Baby leaves can be harvested as needed. Full sized leaves should be harvested in 40 days. Tokyo bekana is a cut-and-come-again crop and will produce multiple harvests.
Asian Vitamin Greens
Growing/Eating
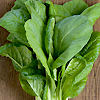
An entirely different kind of brassica, with no mustardy flavor. This green is easy to grow, unfazed by heat, very cold-hardy, with mild, sweet flavor. It is one of our premium selections for those who want to have a quick harvest and loves salad greens. Plant the seeds 0.5-1cm deep about 20-30cm apart in rows 40-60cm apart loosen the soil to at least 12 inches deep, and thoroughly mix in a layer of mature compost. Make sure the soil is well composted and moist throughout the growth of the plant as it is fast growing and will mature in 40 days with baby leaves available in just 21-28 days. White stalks and very glossy green leaves are good for salad, steamed or stir-fry. Sometimes called "mustard spinach."The stalks, leaves and flowers are all edible.
Harvesting
You can pick the leaves regularly as this encourages the plants to produce more and new leaves. Use harvester knife to cut or scissors to assure that there will be no damage occur. You can cut the whole stem at 50 days.
Asparagus "Fat Bastard"
Growing/Eating
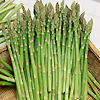
A premium choice for your garden. Asparagus does best in a fairly open position and sheltered from wind. It needs a rich, well-drained soil, so the initial preparation of the bed is very important to the plant's success. It will not grow in very acid soils, but it is tolerant of coastal sites with salt-laden winds. In the autumn before planting, dig a bed 1.2 m wide to accommodate two rows. Plant asparagus 30-60cm apart and cover the crowns about a depth of about 5cm. Lighten heavy soil by adding gritty sand. If the soil tends to become waterlogged, grow asparagus in a raised bed. The following spring, rake the bed level and work in 120 g of pelleted organic fertilizer per square meter. Prepare the asparagus by rinsing them thoroughly, break off any tough, white bottoms and discard. Best served for pickling, deep frying, and blanching, broiling, sautéing, stir frying, grilling and roasting.
Harvesting
Asparagus should be harvested when it is 15-20cm long and before the tips are open. Prefer to harvest them in winter when they are 2-3 years old. Cut the spears just below the surface with a sharp knife. Do not make an excessive harvest in the first year as these results in additional strain on the plant and may result in a decreased yield in the following year. Harvest your asparagus every second day and eat them as soon as possible for optimal freshness and flavor.
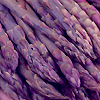
Asparagus Sweet Purple
Growing/Eating
An excellent gourmand selection for your own garden. This variety is susceptible to rust. Use drip or buried drip if possible and avoid use of overhead sprinklers. Plant rows so that the prevailing winds move down the row, keeping the plants drier. The secret to healthy crowns that last up to 15 years is excellent drainage, a sunny position, and lots of mulch. You could use mulch and/or pre-emergent herbicides for weed suppression. The lack of fiber in the spears is the reason Sweet Purple is so tender. Don't cut them until they die back naturally in autumn. Wonderfully mild, nutty flavor when cooked, makes Sweet Purple delicious even raw. Spears turn green when cooked.
Harvesting
The best moment to harvest asparagus is when they are the width of one's thumb, and a height of about six to eight inches. Prefer to cut the spear with a knife at the soil surface. Leave a few mature spears to grow out. These asparagus spears will grow into a beautiful, tall fern, re-charging its crown for the next harvest season. Fertilize the bed immediately after the harvest.
