Selecting Veggies
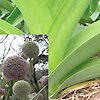
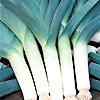
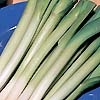
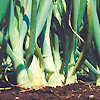
Leek Jaune du Poitou
Growing/Eating
Leeks are cool season member though they can be grown here year round with proper timing and propagation. They will thrive in any well-drained, fertile soil, even in cold areas, thus, makes the leeks the best crop selection for planting. Sow seed 1 cm deep in an outdoor seedbed. Cover the seeds with a fine layer of soil. Raise the soil around the white stem of the seedlings to prevent the stems from becoming green. Transplant the seedlings outdoors, when they are about as thick as a pencil. Remove 1/3 of the tops and roots to stimulate the growth of the seedlings. Put them in a hole 5cm wide and 10 - 15 cm deep. Keep the seedlings 20 cm apart. Water in the hole to wash the roots. Leeks are best for boiling, steaming, braising or fry leeks, or serve them as a side, but they are particularly tasty when teamed with cheese in pies and flans.
Harvesting
You can use leeks at all stages during its growing cycle and have freshly harvested small and large leeks from the same planting. Gently ease them out of the soil, otherwise they might break. Store leeks in the crisper section of your refrigerator and use within a few days.
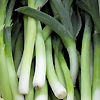
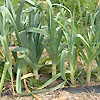
Leek King Richard
Growing/Eating
Best time to raise Leek King in your garden is during early spring. This onion relative does not form a bulb, but rather a fat stalk and strap-like leaves. Prefer to plant in an open area that has full sun, rich, well-drained soil that has been amended with 1lb of complete fertilizer per 100sq feet or add 2- 4 inches of aged manure or compost. Leeks can be direct-seeded, but the most common approach is to grow them indoors as seedlings--up to a pretty good size--then transplant. If planting seeds, do so shallowly, at only 1/8 of an inch, then thin to 9 inches apart. If setting out transplants, dig holes 6 inches deep and 9 inches apart. A double row will help save space. Drop the leeks into the holes, but do not fill with soil. Water will collapse soil into holes over time and leeks will position themselves. Keep leeks watered and never let them completely dry out. Once leaves have developed ample growth, mound soil around base to keep bottoms white. Often harvested young as bunching leeks and used much like green onions but sweeter.
Harvesting
Harvest leeks as you need them but usually it takes about 120–150 days. Leeks may be pulled anytime after they are as big around as your thumb or when the base has at least a 3" white section and it feels firm and solid. If you have good loose soils, leeks may be easily pulled by hand, grasping each one down near the base and tugging gently. If soil is hard, loosening around the leeks first with a garden fork or a pitchfork made the job easier. As you dig or pull them, you may find a few that have started to grow a new leek inside or just beside the old one. Discard those and leave it in the soil to produce another crop. Try to complete harvest by first frost. Once your leeks are harvested, you may rinse off the dirt from the roots, but do not trim the roots. Trim the tops to just where the leaves start to become tough. If you are going to refrigerate a few, you should trim the roots and tops; they will keep nicely for about a month.
Lettuce Australian Yellow Leaf
Growing/Eating
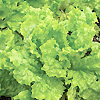
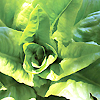
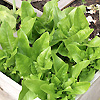
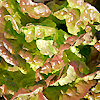
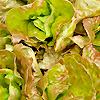
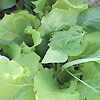
A very large open-headed lettuce, with beautiful and bright green-yellow leaves that are gently frilled. It grows rapidly to form large crinkled leaves on plants, 12 to 16" in diameter. It has a good flavour, crunchy texture, very decorative, and slow to bolt. It makes huge lettuces and produces large yields in a short time. Raise seedlings indoors using seedbeds and containers. Thinning is very important. Transplant into the final location and remember to keep the soil moist by watering regularly. Feed liquid fertilizer every 2 weeks. Australian yellow leaf is very excellent plant to grow and is best serve in salads and stir-fry.
Harvesting
Harvest when outer leaves are large enough and continue until a central stalk begins to form, which signals the end of the harvest period. You can harvest the entire plant when it's mature but still young and crisp. Cut with a knife just above the ground level leaving few old and damage leaves. The stem remaining in the ground may then continue to grow and sprout new leaves. Harvest when the heads are firm. Don't wait for them to reach full maturity, as they will bolt soon.
Lettuce Amish Dear Tongue
Growing/Eating
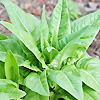
Lettuce Amish grows best in cool weather in the spring and Autumn and respond to well-prepared soil and regular weeding and watering. It has a triangular crunchy and tender that makes it best for your gourmand selection. Sow directly into very fertile, loose soil with full or partial shade. Thin down gradually to final spacing once plants are established. Scatter seeds on soil surface and rake in lightly or otherwise barely cover, but not too deeply. Seedlings should be hardened off by reducing water and putting the plants outdoors2 or 3 days before transplanting. This will help to prevent transplant shock and premature bolting. Regular watering is essential to prevent leaves from getting bitter. Best serve for baby green salads and stir-fry.
Harvesting
It takes about 60-70 days for Amish to reach its full maturity. Pick individual outside leaves if you need them once they are in full size and ready to eat. You can pluck them gradually to encourage the plant to produce more leaves. Complete harvest of full heads when it is mature by cutting off the base.
Lettuce Freckle Bunte
Growing/Eating
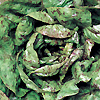
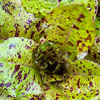
Lettuce Freckles Bunte can be sown in all seasons. This makes it best for your veggie gourmand selection since you can make a successive sowings throughout the year. Prepare your garden well by adding plenty of compost to the soil to encourage rapid growth. Make sure that it is well drained. Water evenly and moderately to prevent bitterness. This veggie is great for salads and can be cooked.
Harvesting
You can pick leaves as soon as it is big enough to use. Pluck the outer leaves and allow the inner leaves to continue growing. You can also use the plants pulled while thinning. Complete harvest when plants are fully mature.
Lettuce Italian Lolo Mix
Growing/Eating
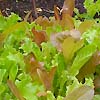
Lolo is red loose leaf type of lettuce having a crisp, semi-succulent, hardy texture with ruffled tips. It is usually grown for its bold flavored leaves, slightly bitter, nutty and for its good looking leaves that adds color in the garden. It is being mixed to other variety of lettuce as supplemental and it could be the best option to grow. This variety grows in cool seasons, warm days and cool nights and, needs fertile soil and in partial sun position. In planting, have your seed bed ready. Grasp numerous amounts of seeds in your palm, and let the seeds fall unto the bed by shaking them with your hands. Ensure an equal distribution of seeds. Cover the seeds with soil and water them evenly. Cover the seed beds with shade, and check every day for proper ventilation and germination. When leaves started to sprout, remove the shade and put cover nets to protect the plants from predators. Wait until the plants are ready for harvest.
Harvesting
When harvesting, see to it that leaves are at least three inches in length and let the entire outer layer is plucked to facilitate growth. You can do multiple harvests in one plant. The whole plant can be cut off at the base traditionally. Yet few leaves on the stem can be left. This will enable the plant to continue to grow and sprout new leaves. Bolting of the leaves will happen if you will wait the plant to reach its full maturity and the taste will become very bitter and tough. To slow down bolting, picking individual leaves can be done.
Lettuce Mignonette
Growing/Eating
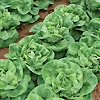
A very lovely looking vegetable that produces tender hearts and resembles a cabbage rose. Best selection to plant in all season as it tolerates heat as long as it is often watered. This variety of lettuce has a fragile, highly edible leaves that bruise easily from harsh weather and many bugs, snails, and wild life are tempted to eat them. That is why it needs exact care. This variety grows annually, and it reaches to a mature height of 7.8 inches. It is best for inexperience gardeners and with those low maintenance gardens. This variety loves to grow in partial sun position, in a loamy soil with a ph of 5.8 - 6.8 - it grows best in weakly acidic soil. When sowing, dig up to 0.49 inches, ensure a distance of 5.85 inches between seeds and remember to water often. Wait until it reaches its best timing for harvest. Best serve in gourmet dressing, soups, stir-fry and many others.
Harvesting
This variety can be harvested if the external leaves are large enough and continue until a mid stalk begins to form. The entire plant can be harvested also when it is mature but still young and crisp. When harvesting, usually the whole plant is cut off at the base. The head will be cleaner if you leave a few leaves on the stem, rather than cutting at actual ground level. The stem that was left on the ground may grow and sprout new leaves. Letting them to reach full maturity will let them bolt afterward. To avoid bolting, picking individual leaves may help.
Lettuce Rouge d' Hiver
Growing/Eating
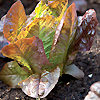
Excellent choice that you must chose for your garden. This variety is very easy to grow and in low maintenance plant. Rouge d' Hiver produces a stunning full-size head with long, crunchy and reddish-bronze to deep red leaves. It grows best in a partial sun position, and needs a loamy soil. It is tolerant to cold but avoid hot weather so it could be planted throughout the year or in all seasons. Have a dig of 0.49 inches deep, with a distance of at least 5.85 inches. To encourage rapid growth, add plenty of compost to the soil. Remember to water moderately to prevent bitterness.
Harvesting
Ready to harvest in 60 days. Its heads range from 8 to 12 inches high and about 4 to 5 inches wide, upright and tightly packed with delicious green leaves. In harvesting, the entire plant can be picked as soon as it is big enough to use. Or the outer leaves can be picked and allowing the inner leaves to continue to grow. The stem left on the ground can grow continually and sprout new leaves. Plants pulled while thinning can be used also. Do not wait for them to reach full maturity, the leaves may bolt. Picking leaves individually may slow down bolting.
Mesculun Provencal
Growing/Eating
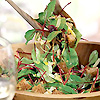
A popular choice that growers always has. It is easy to grow even for the new gardener. Prepare a garden bed with organic materials and good quality soil. It grows best in partial sun area. In hotter areas, the leaves will burn, so you should provide shade, natural or not especially in the afternoon sun. Hold the seeds with your hands, and allow them to fall on the seed bed by shaking them side to side. Distribute the seed evenly. Cover the seed with soil not more than ¼ deep. Water you covered seeds gently by using watering can to prevent the water from washing away the soil. Cover seed beds with shade cloth to reduce frequency of watering. To see if the seeds have germinated, be sure to check daily. Provide even and regular watering. Protect the seedlings from predators to avoid damaging the plant.
Harvesting
Well tended mesclun plants grow fast. After about 30 to 40 days, you can begin cutting the leaves when it reaches about 4 inches. During harvest time, you will need a basket or bowl and a regular pair of scissor. Gently hold a bunch of leaves with one hand while cutting with the other. Leave a leafy crown on the plants so that they can re-produce for another harvest. You can have a 2 to 3 harvest time for your mesclun if proper care is given. To encourage new growth, you can apply Nitrogen liquid fertilizer after each cutting.
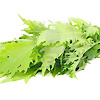
Mustard Minuza
Growing/Eating
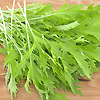
Gardeners usually grow Minuza for its tender and tastier leaves. Scatter seeds in a finely rake and well prepared soil. Cover seeds lightly with and don't let the seed bed gets dry. Plant them in an area that has full or partial sun and make sure to put an exact spacing. Wait until it produces lovely leaves for partial harvest. Best serve as baby green salads and it's also good when it is cooked.
Harvesting
Pick individual leaves when they are young and tender, 3 to 4 inches long, or cut and use the entire plant. Complete the harvest before the plant goes to seed about 30-40 days. Hot weather will cause leaves to become tough and strong flavored so complete the harvest beforehand.
Nasturtium Climbing Mix
Growing/Eating
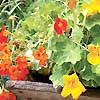
An excellent veggie choice to be planted during Autumn-Summer as they are easy to grow crop. They are most often seen in rich shades of yellow, orange, pink, red and mahogany but there are also varieties in subdued shades of butter yellow and cream. Care of nasturtiums is minimal; in fact, nasturtium plants are one of those specimens that do best with a little neglect. Rich, fertile soil or too much fertilizer results in lush foliage growth and few nasturtium flowers.
Seeds must be sown directly for best result as transplanting may result to damage of the plant. Use peat pots if you'd like to plant it first indoors and transplant them without disturbing its roots. For faster germination, nick the seed or soak the seed overnight with lukewarm water and then plant immediately into a container or area of the garden which allows plenty of room for growth. You may plant them near walls, fences, hedges or place a trellis near the planting area of climbing nasturtium varieties and train the colorful vines to climb with little effort.
Harvesting
It takes about 52 days to harvest its bloom or 110 days from planting. For salads, harvest nasturtium flower buds, flowers, and young leaves in the cool of the morning when flowers have just opened for tastier result. It's also perfect for herb vinegars, appetizers and garnishes. Pick your nasturtium blooms and gently rinse. Use them immediately or store it in refrigerator with a plastic bag. For seed harvest, wait for the seeds to dry and store in tightly closed bottles.
Onion Australian Brown
Growing/Eating
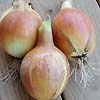
Onion Australian brown is ultimately the best crop you can grow in your garden during winter. In sowing Australian brown seed, position in a full sun location does best and in an acidic soil. Have a well-drained soil at least 8 inches deep. See to it that the ground should provide an adequate drainage. Dig up to 2 to 3 inches of composite into it. Make a ½-inch-deep furrow and sow your Australian brown onion seeds. Provide a space for about 3 inches apart or thin the seedling after germination to create that distance among them. Cover the furrows with topsoil and water to 1 inch below the surface. Continue to keep the seedbed moist. Pull any weeds that sprout while it grows.
Harvesting
Signs that the Australian brown onion is mature and ready for harvest are when the tops fall over and start to change color. It happens with in 25-34 weeks from sowing. Gently pull it from the soil by loosening it around using a fork. Allow onions to dry before storing. Store in a cool, dry airy place. Use a net bag or make a string by weaving the tops together.
Onion Barletta
Growing/Eating
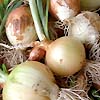
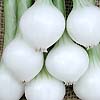
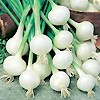
This white, crisp, and marble size onion is excellent when served whole in sweet-sour sauce, salad, boiled, or pickled. Plant Onion Seeds in full sun during Autumn. Prepare a nice bed and add some good compost or 10-10-10 if you do not have any. Rake well and scatter your onion seeds and try and get them about ¼ inches apart. Firm them down by hand and cover with ¼ inch soil. Keep well watered until they germinate and provide supplemental irrigation. Once they have germinated and grown to 3" or 4", you can begin to start thinning them out. Leave at least an inch between onions. Pull any weeds as they will be the biggest problem you have growing from seed.
Harvesting
Young green stems are harvested as scallions when the bases begin to bulge. Barletta bulbs reaches around 2- 3cm in diameter or more likely to a marble size. Harvest by gently loosening the bulbs from the soil and spread them out in an airy location away from direct sunlight. This will allow the skins to harden. Harvesting mature bulbs in late spring can begin after the leaves on more than half of the plants fall or bend over. Remember to place the bulbs in cool dry place to avoid rotting.
Onion Red Marksman
Growing/Eating
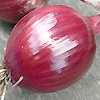
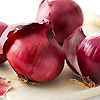
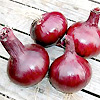
Onions will do in most soils as long as it is firm. They like sunny position with a rich but light soil. You may raise them in raised-beds, containers or in an open ground with free-drainage soil. Remove all the stones before planting by raking the soil and thread the soil down so it will be firmed. Plant seeds 30cm in height and 10cm by space. These onions are perfect for salads or stir-fries as it has sweet, crisp and juicy flesh.
Harvesting
Harvest Onions anytime once you see 1/2 of the tops have fallen over and the bulbs' skins have a papery feel. Dig around the Onion bulbs rather than pulling it directly with your hands. Shake and brush off any loose soil and let the bulbs finish curing in a warm, dry place with good air circulation. Leave the leaves on. Wait until the outside onion skins dry and the neck - where the leaves meet the bulbs, starts to shrivel. Then you can store them in a cool, dry location. Do not wash or fridge them.
