Pak Choy
Growing/Eating
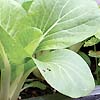
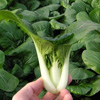
Pak- Choy is best choice for your garden crops. It best grown in a fertile soil in a sunny position. On the ground, sow seed apart. Wider distance is best for semi-mature to full-size heads. When sowing a baby leaf, you can make it under clothes or fleece in mild areas to keep them grow healthy, gradually thin seedlings from baby leaf, to semi-mature plants, finally to mature plants. Remember to keep plants well watered throughout the growing period to avoid bolting.
Harvesting
After 30 days from sowing as baby leaf, or between 45-75 days as semi mature to full-size heads, it is then now ready to harvest. Separate the leaves with small holes, and areas that turn brown for they are already damage.
A headed crop of Pak Choy can be lifted entirely or cut around 3cm above ground level and then left to re-sprout. You can use it now in salads or stir-fries as a bay leaf, or use in a variety of Oriental dishes as a cooked vegetable when semi-mature or as fully-grown heads.
Parsnip Hollow Crown
Growing/Eating
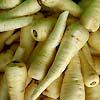
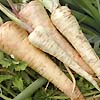
Parsnip hollow is preferred by gardeners mostly for its addicting taste. As this is a root vegetable, deep, fertile, and slightly sandy soil is preferred. The sand aids drainage as well as allowing the soil to warm up as quickly as possible in spring. Full sun is needed but parsnip also can tolerate partial shade. Parsnips are deep rooted and soil must be deep and well drained. Dig up to 12 inches deep where all lumps and rocks have been removed so that roots do not split and fork. Avoid sowing into freshly manured ground as this to will cause fangy roots. Transplanting can also damage the plant. Keep parsnips watered during dry spell to avoid cracking or hard cores. The seed is usually sown in groups of 3 of 10 at spacing's of 10 to 15 cm. The wider the spacing, the larger the roots will become. Prepare planting beds two to three months in advance adding well-aged compost. See to it that the manure added is aged, too fresh will cause root crops to fork.
Harvesting
Parsnip reached its maturity 100 to 130 days after sowing. Pull them out by lifting it with the use of spading fork being careful not to damage the roots. Low temperatures convert the roots' starch to sugar. Dig roots before the ground becomes unworkable. Complete the harvest before the return of warm weather. You can store the parsnips in refrigerator for up to two months to avoid sprouting. Storing it in cool place normally last up to six months.
Pea Green Feast
Growing/Eating
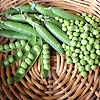
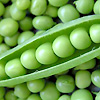
Green feast one of gardeners' favorite garden crops that they usually chose. It is a cool weather crop and should be sown in intervals of 3 weeks for long supply from early spring until late summer Partial sun position is needed in planting Pea Green Feast Seed. It needs water very often. Dig 0.99 inches (2.54 cm) deep with a guideline distance of 2.97 inches (7.62 cm). Maintain a soil temperature to higher than 4°C / 39°F to ensure good germination. Ensure that this plant is protected from frost damage. Peas do not need extra feeding but do like moist, limey soils and good watering. Take a look at sowing Green feast about 35 days before your last frost date. This plant mainly grows annually, best for a single growing season.
Harvesting
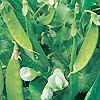
Once they are full and before veining appears on the pods, harvest can be done. Pick peas regularly, every day, as they get too large and woody and will soon lose their sweet taste if left too long. The younger the sweeter. Pea shoots and pea flowers can be eaten too. Store them at the crisper of the refrigerator for two weeks or peeled, blanched for a minute and frozen.
Pea Snow Climbing
Growing/Eating
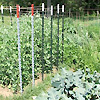
Planting Snow peas seeds need a right climate. Hot temperatures hinder flowering and pod development. It an excellent crop to plant as it is mostly prefer cool moist climate. A well drained humus rich soil with a climbing frame is best. Ideal condition for the soil is slightly alkaline with a pH 5.8 - 6.8. Provide frame to climb on because when they grow, they climb. Young plants are tender, you can put in place before planting the seeds to prevent damaged. You can use wire, trellis or bamboo around 1.5 to 2m tall for frame. Plant the seeds directly to the soil with 10 cm intervals, and remember to water them adequately.
Harvesting
When they are large enough to eat, they can be harvested. Pick them in the cool of the morning, the smaller the sweeter. Harvest can be done within 10-12 weeks from planting. After the crop has been harvested, chop up and dig in the plant as gene manure, or compost them. Peas can be used best as soon as possible after harvest, but can be stored in the refrigerator for a few days if cooled immediately.
Pea Snow Dwarf
Growing/Eating
Plant peas as soon as the ground is ready. Provide a temperature as low as 40°F- 60°F to let the peas occur its germination. Peas are a spring crop, they do best in cooler weather, during summer they stop producing. When sowing above the block or trench, drop the seeds fairly, emerging vines will help support each other. Pease can convert atmospheric nitrogen into nitrogen compounds in the soil, so they don't need much fertilizer. Can be eaten in raw or stem,
Harvesting
Peas can be harvested about three weeks after blossoms appear. You can peak peas every day for a greater harvest. When the pods are plump and bright green, pick snap peas. Pick snow peas while the pods are still nearly flat-the seed will be barely developed.
Using with your finger or scissors, pinch pea pods away from the vine. Hold the upper stem with one hand and pinch the pod away with the other. Avoid pulling pods away from the stem to avoid injuring the plant.
Pea Snow Yukomo Giant
Growing/Eating
Yukomo Giant is a vegetable variety that grows annually. Best crop to be selected for your garden during Autumn to Winter. It grows with a height of approximately 1.55 meters. It is a low maintenance plant and great for beginner gardeners and those that like gardens that don't need much overseeing. It grows in a full sun and needs to be watered often. It needs to be protected from frosts and low temperatures. Soil must be well drained. Dig up around 0.99 inches (2.54 cm) and aim a spacing of at least 2.97 inches (7.62 cm). Water regularly to keep the soil moist. Yukomo produces many fruits when it is properly cared.
Harvesting
Harvest in approx 72-74 days after sowing You can picked early while it is still flat. Handle with care when harvesting to avoid new flowers from damage. You can use scissors or a harvester knife for an easy picking.
Pea Sugar Snap Climbing
Growing/Eating
Pea is very easy to grow and excellent choice when planting climbing beans. Choose an area where they can get around six to eight hours of sunlight a day. Plant in a loamy, well drained soil and add fertilizer. Plant the seeds 3 inches apart and dig about half inch deep to cover the seeds. Place a support for the vines to climb either bamboo or stakes and tie some twines on it. As the plants starts to climb, once a day gently curl the vines around the twine and stakes. Do it until they take a firm hold themselves; although the training time varies, this should usually take a few days and at most a week or two. Peas can be cooked directly from the plants and can be served in many methods.
Harvesting
Harvest in about 122 days from planting. You can pick the pods while they are young and very tender if you want to eat pods. As soon as the seeds inside the pod begin to look a bit chubby, it is time to pluck them. Shell the full size peas.
Potato - Banana Seed
Growing/Eating
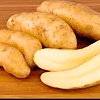
Potato banana is part of our gourmand selection. This variety prefers loose, fertile, slightly sandy and acidic soils. Don't apply large amounts of organic matters as this cause the increase occurrence of potato scab. Potato Banana is grown from its tubers. Each tuber can be cut down to produce multiple plants, as long as each piece has one to three eyes. Smaller tubers are often planted whole, while larger ones are split up. Expose the cut-up pieces to fresh air for 24 hours ahead of planting. Make sure the soil is dry when planting them to reduce the chance of rot setting. Tubers should be planted at a depth of 20 - 25 cm, allowing the plant to develop a sturdy base. Seedling space should be 15-18 inches apart. It takes two weeks for seeds to germinate. Great for salads, French fries, mashing and baking.
Harvesting
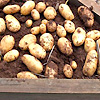
Potatoes should be harvested 2 weeks after the vines have died back or mature usually about 4 months. Dig carefully around the base of the potato using fork when harvesting it to prevent bruising, skinning, or cutting the tubers. Damaged potatoes should be used as soon as possible. Allow the tubers to cure minor cuts and bruises and thickening of its skin for best storage.
Potato – Bintje
Growing/Eating
Bintjie produces egg size, creamy yellow flesh and excellent flavor anyway you fix them. This potato is a disease resistant and is very rich in potassium, iron, minerals and vitamin contents. Recommended planting spacing in the row are 40 to 45
cm for table and 20
cm for seed production. Tubers keep fairly well, have low starch content, and are not subject to blackening of the flesh or second growth. Best for making chips, soups, stews and salads.
Harvesting
Harvest immediately when potatoes are ripe. Indication that potatoes are ready to harvest is when plant vines turn yellow and/or die back. Dig carefully; avoid bruising or damaging the potatoes if possible for longer storage.
Potato - Dutch Cream
Growing/Eating
Potato Dutch is known for its large, oval shape, with yellow waxy color. It is best option for garden cropping and best it is also suited to many delicious dishes, particularly mashing and is excellent for purees and soup, the flesh is buttery and rich. Also makes a great roasted potato, and is well worth trying for its delicious taste. Prepare and loosen soil properly and add plenty of aged compost. Plant out tubers with spacing at about 25 cm or more apart. Water regularly if needed to keep the soil moist.
Harvesting
Harvest in 15-20 weeks. Potatoes can be left in the ground where conditions permit, but do not leave them too long as they are susceptible to damage, slugs and rotting. Use a garden fork to loosen the soil, being careful not to prick any of the tubers, and then pulling the whole plant out. A double layered paper sack, folded loosely at the neck or hessian bags are ideal for storing. Potatoes are best stored in a cool, dark place.
Pumpkin Anna Swartz
Growing/Eating
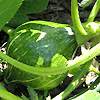
Pumpkin Anna produces rich, sweet yellow flesh fruits and mostly weighs 5-8 pounds. Squash are hungry plants, so they need much food as they can get. They are all heavy feeders requiring rich composted soil and specific organic amendments. Soil moisture must be kept by applying water regularly. Wait until the soil is warm to plant seeds, or transplants. Supports can be provided to save space in the garden or you can leave the vines in the ground. It's best to raised fruits off the ground with some straw or some sort of structure to ensure they don't rot while maturing.
Harvesting
Ninety to One hundred days from planting. Harvest when the skin is hard to be dented with fingernails or the color fades by cutting the vine either side of the stem, not cutting the stem itself. Bring inside and store in the warm for 10 days for the fruits to cure.
Pumpkin Australian Butternut
Growing/Eating
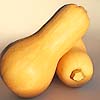
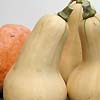
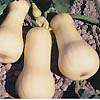
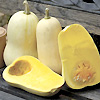
Butternut pumpkins are quicker maturing and sweeter than the grey types, and take about 15 to 18 weeks from sowing to harvest. Great variety selection to grow from spring to summer. It produces a fruit with a yellowish beige skin and an average size of 2 kg. Choose a sunny, sheltered spot in the garden for your pumpkins. Before planting, improve the soil with compost, well-rotted manure or other organic matter. Sow seeds in pots or in a protected place and then transplant into your garden, or direct sow after the last frost. Space the rows between 1.5 m and 2 m apart and space the plants around 1 m apart in the plant row. Sow seed at a depth approximately three times the diameter of the seed. As roots can penetrate up to a meter deep, a well-drained soil is preferred. This pumpkin can be roasted, toasted, puréed for soups, or mashed and used in casseroles, breads, and muffins.
Harvesting
Butternut squash is ripe when the rind is hard and has turned a uniform tan color and the stem is dry. Cut the squash from the vine with a sharp knife or use secateurs, leaving about 2 inches of the stem. If the fruit is intended for storage, 'cure' them first by exposing the skin to the sun for a few days and allowing it to dry out completely. However if the pumpkin is cut, wrap in plastic and store in fridge.
Pumpkin Bohemian
Growing/Eating
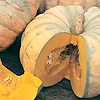
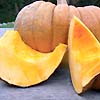
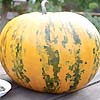
Pumpkin Bohemian produces a big, round, ribbing, sweet yellow flesh that is extremely great for baking breads, soups, and pies. Thus, makes it best choice to grow during summer or spring. Prefer to plant seeds or seedlings in a sunny spot in your garden with plenty of compost and organic matters. Ideal spacing is 1m apart each plant. Remember to water frequently to keep the soil moist. Provide mulch to cover the ground for fruits to lie on. Supports are also advisable if you prefer the vines to climb. Remove all the weeds that grow. Wait until harvest.
Harvesting
Harvest starts in 119 days. When the preferred size is achieved then you can pick the squash. Complete the harvest when all the fruits are ripe, usually the color turns to pale yellow. When harvesting pumpkins handle them carefully to avoid cuts and bruises. Cut the fruit off the vine with a pruning shears or sharp knives.
Pumpkin Futsu
Growing/Eating
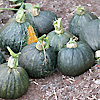
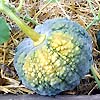
Fatsu Squash have dark green-black skin with golden, flattened, round and has heavy ribbing about 1-2kg each with nutty flavored flesh flavor. You can plant this squash as part of gourmand veggie selection. When the last frost has past, plant into the garden with the benefit of a cloche if possible. Make a hole in the ground similar for planting trees. 1m x 1m x 1 m and then fill this with compost. Allow to grow on at random until the fruit has set. Pumpkins are gross feeders when it comes to organic matter and water. Best eaten when the skin matures from black to dusty orange. Great for baking, making soups and roasting.
Harvesting
Cut for when the skin is rock hard and stalks are brown. Avoid bruising or damaging as it will cause to an early rotting. Allow the pumpkins to cure in the ground after harvest and put them into storage. Fruits can be stored up to 8 months.
Pumpkin Kakai
Growing/Eating
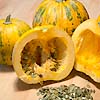
'Kakai' is an eye-catching, black-striped, and medium to small, easily manageable fruit that is a semi-bush type with short vine plants and fruits with completely hull-less seeds.This gourmand selection can be planted out 2-3 feet apart between each plant in rows. Trellis or supports can be provided when the vines start to grow longer. Vines can also be left in the ground but provide mulch to raise the fruits from the ground. Keep well-watered throughout the growing season. Kakai pumpkins can be eaten raw or best add into salads. Also good for roasting, baking, grilled and making soups. The seeds can be eaten too.
Harvesting
Harvest pumpkins when they have developed fully, and have a hard rind. The rind will be firm and resist denting when pressed with a thumbnail. When harvesting pumpkins handle them carefully to avoid cuts and bruises. Cut the fruit off the vine with a pruning shears. Leave a 3 to 4 inch handle on the pumpkins. Complete harvest when all the vines have dried up. Properly cured and stored pumpkins should remain in good condition for 2 to 3 months or longer.
Pumpkin Potimarron
Growing/Eating
Potimarron is inversely pear-shaped, with a flavor like chestnuts and has edible skin. This veggie is a premium selection for planting and is excellent for roasting and making soups. Seeds can either be sown directly outside or can be started indoors. When planting directly, be sure that the soil has a warm temperature. Do not sow in cold soils. Sow 2 seeds every 1 meter and thin out to the best seedling. Keep well watered throughout the season. Feed and mulch regularly.
Harvesting
Harvest the pumpkins once the stem turns brown and starts to dry out. For immediate use, harvest when the skin loses its sheen. Use a sharp knife or shears to cut the stalk of the fruit. It is best to leave an inch stalk to the fruit for longer storage.
Pumpkin Waltham Butternut
Growing/Eating
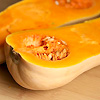
Butternut produces sweet, moist, small pear shaped fruit, with pale skin and orange flesh growing up to 25cm or 2kg. Best veggie to be selected as fruits are great for stuffing and for slicing to roast and are excellent source of beta-carotene and a good source of potassium, niacin and iron and thiamin. Plant seeds individually or by two pieces with a depth of 20mm and cover seeds lightly with soil. Recommended space between each plant is 100cm-200cm or 1-2 meters. Wider spacing is recommended in areas where irrigation is not used. Provide supports for the vines to climb on or add mulch when you leave them on the ground to keep the soil moist and for the fruits to lean on.
Harvesting
Harvest when stems begin to shrivel or you can no longer pierce the skin with a thumbnail. Cut the stalks from the vines using shears or sharp knife but be sure to leave 1-2cm stalk from the stem. Fruits best stored in a cool dry place or warm areas.
Quinoa
Growing/Eating
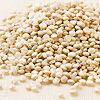
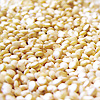
Quinoa is great gourmand selection to grow in home gardens. Its great plant for grain harvest, and looks good at the back of a floral border. This plant prefers to grow during early spring season. Choose well-drained, sandy-loam, loamy soil with added organic matter. Prepare the soil in advance to slacken the soil and remove any weeds. This plant can have trouble if weeds are competing in its growth. Dig up to ¼ inches deep and sow seeds in the soil with a distance of 10-14 inches from the other. When it reaches a foot high, it will start to develop faster and become self-reliant. Minimal water is needed to this plant, since it is very flexible to dry areas. Quinoa leaves are great for steaming and salads. Grains serve a very nutritious meal with high protein and vitamin contents.
Harvesting
Quinoa's leaves are edible so can be picked as young as they are to be steamed or for salad purposes. Harvest usually begins when the seed can barely be dented with a fingernail and plants have dried or leaves have dropped off. You can harvest all your seeds and just allow your grain to complete its drying with its stalks. The seed should thresh easily by hand at this time. Remove all leaves and dirt of the harvested dry Quinoa seeds through fan or let the breeze of the wind blow it away. Do not harvest during rainy season since mature seeds are attractive to moist and can germinate within 24 hours.
