Selecting Veggies
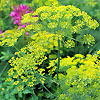
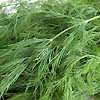
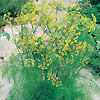
Dill Bouquet
Growing/Eating
Sow directly outdoors in spring through early summer after danger of frost has passed. Plant in full sun and well-drained loose soil, rich in fertile. Use organic matter to enrich the soil before planting. Sow dill seed ¼ to ½ inch deep and space rows should be 2 to 3 feet apart. Barely cover seed to help germinate and remember to water regularly until the plants is established. Stake the tall plants to prevent wind damage if your garden is in a windy spot. Dill will re-seed itself readily so plant in a spot where you can allow dill to grow for several years.
Dill is used fresh or dry to flavor many kinds of food. Leaves add flavour to salads, soups, stews, dips, sauces, fish, omellettes and vegetables. Dill seed is a pungent ingredient found in salad dressings, pickles, sauerkraut, and even breads. Also used in potato salad, coleslaw, steamed cabbage, squash, carrots, and cauliflower. Dill can be also a handy salt substitute for people on low-sodium diets.
Harvesting
Approximately 60-65 days to maturity. You can start harvesting the fern-like leaves about 8 weeks after planting and pick continually. Just pinch off the outer leaves close to the stem. They are most flavorful just when flower heads are opening. Enjoy the leaves at their peak when they are fresh, finely chopping for best flavor. Leaves can be frozen for later use.
Harvest dill seeds as soon as they turn brown, before they fall to the ground. Snip the flower head from the stalk then dry them for a few days in paper bags with air holes in the sides, then shake seeds loose in the bag or hang in cool, well-ventilated room. Once the seeds have dried and fallen into the bag, collect them for storage in an airtight container.
Harvest dill seeds as soon as they turn brown, before they fall to the ground. Snip the flower head from the stalk then dry them for a few days in paper bags with air holes in the sides, then shake seeds loose in the bag or hang in cool, well-ventilated room. Once the seeds have dried and fallen into the bag, collect them for storage in an airtight container.
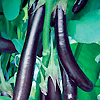
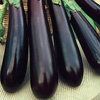
Eggplant Long Purple
Growing/Eating
Great veggie to choose for spring crop. Raise the seeds first in seed beds before planting outdoors. Eggplant does best in rich, slightly acidic, well-draining soil with compost added and in sunny spot. Eggplants need to be spaced about 24" apart in rows at least 12" apart. Floating row covers or cloches prevent plants from cold, wind and insect damage. Give eggplant about an inch of water a week and, once the plants are established and the ground is warm, mulch to retain moisture and deter weeds. Eggplants are best when cooked especially with eggs.
Harvesting
The dark purple fruits are best used before they are 8 to 10" long. Each plant grows to 24 to 30" and produces 8 or more eggplants. Cut fruits from the plant when they reach full cultivar color and are firm and glossy, but not hard to touch, about 60-90 days after transplanting. Picking before they are fully grown is fine and will encourage more fruit set. Make sure to cut the fruits with shears, knife or scissors to avoid damaging the plant. Clipping fruits regularly will help promote new ones to grow. Harvested eggplants will store in a cool spot for 1-2 weeks.
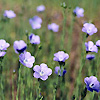
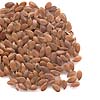
Flax Linseed
Growing/Eating
Flax seeds come in two basic varieties: a brown; and yellow or golden. Flax or Linseed is a fantastic plant to grow in the organic garden. It is a versatile plant which improves the soil and provides nutritious seed for human and animal consumption. They are grown from seeds. Flax seeds can be directly seeded into your flower garden, or seeded indoors for transplanting later. The plants grow up to 18" - 24" tall. Ideal plant spacing is 10" -12". They will tolerate a little crowding. Grow Flax in full sun with rich soil. Mix in compost when planting, if your soil is not rich. Keep the soil moist, not wet and keep the weeds down. In the home garden, mulch around them to help retain soil moisture. Add a general purpose fertilizer when planting them, then once a month after that. After the purple-blue flowers blossom, the seeds start to form in papery husks. When the husks are straw-colored, the seeds have formed inside. Clumps of delicate foliage give way to true blue flowers in the summer. Prune plants to promote good air circulation. Grow them in groups for the best effect. They are commonly used as a wildflower and for oil extraction. Try them in containers, too.
Harvesting
Flax is harvested for fiber production after approximately 100 days or a month after the plant flowers and two weeks after the seed capsules form. The base of the plant will begin to turn yellow then harvest when the seed capsules are 90% brown. If the plant is still green the seed will not be useful, and the fiber will be underdeveloped. The fiber degrades once the plant is brown. Pulled up the mature plant with the roots (not cut), so as to maximize the fiber length. After this, the flax is allowed to dry; the seeds are removed, and are then retted. Monitoring for grain weevils is recommended if flax is stored for more than a year. Also, if green material is present in the harvested flax, cleaning the grain is recommended before storing it.
Garlic Australian White
Growing/Eating
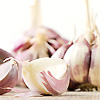
Best choice for gardeners who love garlic. This variety produces medium size bulbs with a smooth flavour milder than other varieties. When planting, separate cloves by breaking the head or bulb. Plant them with the pointy tip of the clove is about 1.5–2cm below the ground and give them space about 15cm apart. Sow garlic into any sunny, well-drained spot in the garden or in a pot and containers. Keep plants weeded by adding mulch around them as they don't like competitions. Water regularly to keep the soil moist and fertilize through their growing season using a complete fertilizer.
Harvesting
You can cut the growing shoots or use the entire young garlic plants as 'garlic greens' in stir-fry. Indications that garlic are already mature and ready for harvest are when leaves have started to die, neck softens above the bulb, internal cloves has creamy colour and bulbs are of good size. Pull the bulbs by hand when you need it. Do not allow bulbs to over-mature in the field, as too many skins will be discarded and bulbs will discolour, open up and become sun burnt.
Garlic Italian Purple
Growing/Eating
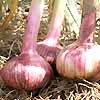
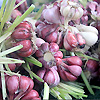
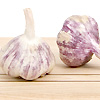
Purple and sweet flavoured garlic variety which is great to choose for your home garden crops. It is mainly suitable for cooler areas as it tolerates light frost. Separate the garlic bulb into cloves before planting. The tops of the bulbs should be just below the soil surface. The flatter or root end should be pointing down. Plant them in rich, well-drained soil and in sunny spot location. Can also be planted in containers. Keep the soil moist and weeded by adding mulch around them. Garlic is usually grown for vegetable seasoning, herbal purpose and many other uses.
Harvesting
They are ready to harvest when the coil twist in the flower stem begins to straighten and the flower stem begins to soften. Purple Garlic usually takes about 10 months to produce a bulb. Harvest immediately when the tops begin to turn brown; don't wait until the tops have completely died back. Treat the bulbs gently as bruised bulbs do not store well. Hang the whole plant in bunches, or spread on racks, and allow drying undercover for 2 to 3 weeks. The skins will then become papery and dry. You can either plait the garlic or remove the leaves and roots, to store on racks or in net bags. Bulbs store better stored whole, not separated into cloves and good air circulation is essential.
Kale Green
Growing/Eating
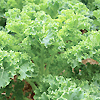
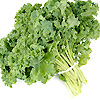
One of the best brassicca choices to plant in your garden in Autumn-Spring season. It is considered a cool weather vegetable and is frost tolerant; and the taste grows sweeter after the plant is exposed to a frost. Plant kale seeds at a planting depth of ¼ to ½ inch. Space plants in rows of 12 to 18 inches. Spacing of beds should be 10 to 15 inches apart. It is commonly started indoors and transplanted into the garden when seedlings are 4 to 6 weeks old. Mulch the bed with a combination of grass clippings, clean straw, and compost to keep the soil moist and weeded. Mound straw around kale once it is 6 inches high to prevent plants from touching the soil; soil easily sticks to kale's often crinkled leaves. Kale does not typically grow well in the greenhouse but can be successfully grown in eight inch wide containers that are eight inches deep. Kale green can be boiled, steamed, microwave or add to cooked pasta during the end of boiling time.
Harvesting
Expect a harvest in 50-55 days from transplants, 70 to 80 days from seed. Cut individual outside leaves for use when the plant is 8 to 10 inches high using a knife. If you harvest the entire plant, cut 2 inches above the soil and the plant will sprout new leaves in 1 to 2 weeks. Complete harvest before it gets old and tough.
Kale Tuscan Black ( Cavolo Nero)
Growing/Eating
Kale Tuscan is a great option to plant when selecting leafy vegetables as it is known as the most disease resistant of all vegetables. This variety grows in almost all conditions, even part shade. Preferably plant them in Spring and Autumn. For the ultimate crop, grow in full sun in a soil that was enriched with compost or manure the previous season and make sure it is well-drained. Start seeds in seedbeds about 1.5cm deep in rows which are 22cm apart. Look for yellowing leaves that may appear round the base and remove them. Keep the weeds under control with regular hoeing. As winter approaches earth up plants to protect against frost and wind rock. Harvested Kale Tuscan can be used in a number of different ways. It is great in hearty meals like soups, but is also great in lighter dishes such as salads and casseroles.
Harvesting
Approximately matures 55 to 65 days from transplant. Wait until the plants are touched by a frost to sweeten the taste before picking. Don't pick or harvest them during mid day or when the sun is high. Prefer to harvest them when the leaves have experienced a cold snap as they wrinkle and curl and strengthen greatly, creating a more satisfying, textural leaf. Pluck individual leaves as you need them; one or two leaves for each serving. Avoid cutting the developing bud at the centre of each plant. Complete harvests before sunny season comes or before the plants get old and tough.

 2-thumbs.jpg)
 3-thumbs.jpg)
 1-thumbs.jpg)