Selecting Veggies
Cabbage January King
Growing/Eating
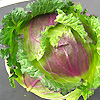
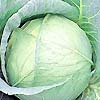
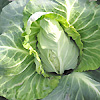
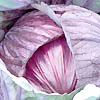
Cabbage January King is a flat, round, medium purple color. It will thrive on almost any well drained ground, sunny position, fertile, moisture-retentive and firm but prefer a medium to light soil which will maintain a reasonable amount of water. Best veggie choice for your garden crops for its sturdy cabbage with a rich, earthy flavor that's hard to beat. Sow thinly direct into a finely raked seedbed at a depth of ½" Germination 12-20 days. Transplant with a trowel or dibber when large enough to handle, allowing 45cm between plants each way. If the weather is dry, water in well when transplanting. Firm planting will ensure them form big, beefy hearts and protect against wind damage. Protect from slugs and net against pigeons with neetings.
Harvesting
Cut the heads at ground level as soon as the head feels solid, leaving the stump in the ground to produce a second crop of small leafy heads. Smaller heads may grow from the leaves and stems left behind. When cutting the heads from the stems, leave two or three of the wrapper leaves to protect against bruising. Over-mature heads are subject to splitting, especially if they are exposed to moisture fluctuations. Successful storage starts with a good cultivar, free of diseases or injuries. For longer storage, pull the entire head, root and all, from the ground. If left too long in the ground, heads may become fibrous and split.
Cabbage Mini
Growing/Eating
Basic choice to plant during Autumn-Spring season. A rich organic soil and regular, steady water encourage the uninterrupted growth of this kind of crop to produce firm, rounded, green cabbage which is tender and sweetly flavored. Try to plant in a location that enjoys full sun with a space of 50cmx20cm and remember to water moderately. This hardy veggie plant will survive close to or on freezing temperatures. A soil ph of between 6.0 and 7.5 is ideal for Mini as it does best in weakly acidic soil - weakly alkaline soil.
Harvesting
Harvest in 69-90 days. Use a sharp knife to cut heads when they are firm. Leave stalks and roots in place to produce tasty little cabbages; eat them like Brussels sprouts or let them develop into a second crop of small heads.
Cabbage Mini Wongbok
Growing/Eating
Best veggie to be sown in Autumn. This crop produces an upright broad head, averaging 9" high by 6-1/2" in diameter. Leaves are light-green with a white heart. They can be sown in modules and transplanted 4-6 weeks later. It grows best on a range of soils from light sandy loam to heavy loam, but prefers deep, well drained soils as it is susceptible to root rot. Regular spacing is important, as irregular spacing will result in greater variation in head size, and an overall lower yield. Wong Bok is delicate and mildly flavored so use it fresh or just lightly cooked in a stir fry or steamer. It is very nutritious, being high in Vitamin A, potassium and folic acid.
Harvesting
The plant matures more rapidly in warm weather. Harvest few leaves at a time and then you can cut the entire stem when heads are well filled and firm but not hard, and before flower stalk initiation. Pick by hand in the cool part of the day, removing outer leaves and trimming the butt so it is flush with the lowest leaf bases. Complete harvesting may be done in 70 days after planting.
Cabbage Red
Growing/Eating
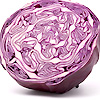
Best choice to plant in all seasons for continues crop yielding. Cabbage will grow in any well-drained moderately fertile soil, but for best production, it needs soil that is rich and fertile, in a sunny position and with plenty of compost worked in. Avoid soil that becomes waterlogged or conversely dries out rapidly. Start seedling indoors before planting outdoors. Once the seedlings grow to about 2 inches tall, and have developed their first leaves, they can be hardened off and moved outside for transplanting. Good spacing would be at 12- 26 inches apart. This cabbage can be eaten raw or cooked.
Harvesting
Cabbage can be harvested anytime after the heads form, usually takes about 70-75 days. Cut the cabbage heads with a knife before they crack or split. Cut as close to the lower surface of the head as possible, leaving the loose outer leaves intact. Prefer to harvest them in the morning when the heads are cool. When heads mature, they are vulnerable to cracking or splitting if a sudden heavy rain comes. Small cabbages will form on the stem and provide a second harvest.
Capsicum Chinese Giant
Growing/Eating
All the best for Spring-Summer crop for your garden. Chinese Giant Pepper contains a powerful antioxidant and is sweet and mild to eat- a very healthy treat. This plant is very tender and enjoys full sun. Each plant produces huge crop usually 1.3kg and fruits sizes ranges to 6" long red peppers that are 4 1/2" across. You can thin the fruits for larger pepper harvest. Compact plants are great for smaller spaces or small containers. Absolutely perfect for stuffing, salads, and cooking.
Harvesting
Peppers turn from green to red when mature.
You can pick them when its fruit color is dark green to bright red around 75-80 days. Using scissor carefully cut them from the stem to avoid stem wounded or you can twist them gently in an upward direction.
Capsicum Mini Sweet Mix
Growing/Eating
Capsicum Sweet Mix is a mixture of capsicum plants, each bearing different shaped fruits, in colors of green, orange, white, red, yellow or dark purple. These are best choice for your gourmand crop planting as they are a heavy bearing, disease resistant, vigorous plant that will bring you a summer full of crisp bite-sized nibbles. Suitable for growing in a greenhouse or outdoors.
Plant the seeds in a sunny position with 30cm apart and 60cm apart in rows. Apply fertilizer prior to planting seedlings, and again when fruit begins to swell. Water plants with warmish water. Be careful not to let the plants wilt. Excellent for gourmet dishes, stuffing, and salads.
Harvesting
Harvest sweet peppers when they reach the preferred size or color. Harvesting them while they are still green encourages the plant to produce more fruits. They will not reach their full color until fully ripe. If you prefer ripe peppers, you will have to wait longer and you will only get fewer peppers.
Capsicum Seven Colurs Mix
Growing/Eating
An interesting and tasty mix of varieties of many colours including Sweet chocolate, white, purple, gold, orange, green, and red. Great choice to plant for toppings, salads, and cooking. Mix Capsicums grow well in a hot sunny spot - they prefer rich, free draining compost soil. Best sowing time is Spring- Summer. To grow Capsicum, drops seeds 0.25" deep in seedbeds. When seedlings reaches up to 6" tall, transfer them into the final location. Add fertilizer at least once a month when you see that the fruit is starting to form. Water regularly to keep the soil moist.
Harvesting
You may start harvesting your crops once the peppers are at least 3 inches in diameter while it is still green about 10 to 11 weeks after sowing. It can take several weeks longer to harvest ripe, sweet and colorful Capsicums, depending on growing conditions. Prefer to harvest fruits using knife or scissors rather than twisting them. Continuous harvest will make the plant create more produce.
Carrots Heirloom Mix
Growing/Eating
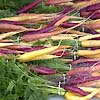
A perfect veggie choice to plant in your garden that would bring you no regret. They are best grown during spring season and preferably grow in an area with full sun, sandy or humus, well prepared soil and well- drained. Carrots need a very well processed compost to loosen the soil. Remove all un-decomposed matter or rocks as they will alter the shape of the carrots. Avoid planting them in a wet soil or swampy area to avoid rotting of the roots. Once the tops are a few inches high, mulch the soil to keep the roots cool and keep it weeded so they aren't competing for water. Water the plants often if soil is dry. Thinning is critical to reduce competition from neighboring plants. Carrots are best for salads and can be cooked by just about any method.
Harvesting
Harvest occurs in 60 to 80 days after planting. They can be harvested over a long period of time because they can remain fresh in the soil for many months even after the tops have been killed by frost. Picking can be done by hand trowel, stay far enough away from the plants as to avoid damaging the carrot itself. For larger harvest, use pitch fork or shovel and dig alongside the row. Be careful not to stab or cut the roots of the carrot. Pull the tops up and shake the soil off the roots. It can be stored 3-4 moths by simply washing off excess soil and placing them in airtight containers or plastic bags.
Carrots All Seasons
Growing/Eating
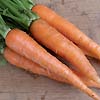
This variety produces a large, super crunchy and rich in vitamin roots. This is an ideal veggie to plant in your garden during spring season. You can plant them in containers as long as you have the depth or directly sow in garden. Carrots need deep, well-drained soil that is free of rocks, stones, old roots or anything else that could get in their way. Add some compost and well-rotted manure, and mix that in well with the soil. Plant Carrot 'All Seasons' seed about 1cm deep. Keep them wedded and don't over wet the ground to avoid rotting. Eat raw or cooked.
Harvesting
Harvest starts in 3-4 months after sowing. Pull them out by digging first around the roots to gently pull them or you can wet the ground first to prevent them wounded. Wash the roots and then store it in refrigerator using plastic bags or keep it in cool place without washing it.
Carrots Attomic Red
Growing/Eating
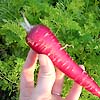
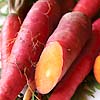
Best gourmand and brilliant red carrots are so healthful and unique-looking, sure to add color to your garden. When planting, prepare your soil properly and remove any stones you find and turn the soil until it has a fine, crumbly texture. Be sure to add well rotted compost as carrots do not like fresh manure in the soil. Too much nitrogen will cause the carrots to grow hairy little roots all up and down the carrot. Mix the seeds with a handful of sharp sand and sow the seeds and sand together. Sand will also aid drainage. Slice a fresh garden carrot and dip it in ranch dressing--you'll taste a piece of heaven. Crisp roots are at their best when cooked but can also be eaten raw.
Harvesting
Red carrots roots are ready to harvest in 75 days. Start pulling up your carrots as soon as they are big enough to eat. It's best to harvest them in the evening to avoid attracting carrot fly. For storage trim off the foliage to extend storage time, but avoid washing the carrots with water. Layer roots them in a container and store in cool, humid condition.
Carrots Paris Market
Growing/Eating
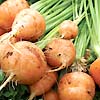
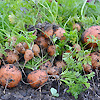
This crop produces small, orange, nearly spherical carrots about the size of a dollar coin and perfect to choose for home garden, patio containers, or market table. Best grown in softer and humus-based soil but can tolerate in fairly heavy soils. Sow seeds directly and thin the carrots in order to allow them room to grow, and so they don't compete for available nutrients, moisture, and light. Use wider spacing to get larger roots. As they grow, carrots push up, out of the soil, so hill soil up to prevent getting a green shoulder. This crunchy and tender and is best for salads and cooking.
Harvesting
Paris Market carrots usually take its maturity in 50-68 days. Flavour is best when the carrot has turned bright orange in color but can be harvested at any size as you desired. After harvest, you can store in sand or sawdust, or simply leave carrots under heaped soil in the garden during the winter, and pull as you need them.
Carrots Purple Dragon
Growing/Eating
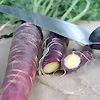
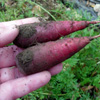
Absolutely unique, purple-skinned carrots with deep orange flesh. Roots have a high antioxidant, beta-carotene and vitamin content, so are best eaten raw and are perfect for making carrot juice. Prefer to plant seeds in well-drained, moist, rich, cool conditions and in full sun position. It needs average water to keep the soil moist. Direct sow the seeds approximately 5mm deep in groups of 4 spaced 2cm apart. These carrots are sweet and delicious raw or cooked, but they lose much of their gorgeous color when boiled.
Harvesting
Purple dragon matures in 65 to 70 days. Pull the roots (wet the ground to make harvest easier) when the shoulders are deep purple. Store them in the refrigerator, in a plastic bag, with the foliage trimmed off. Don't store them near apples or pears, which give off gases that turn carrots bitter.
Carrots St Valery
Growing/Eating
Great gourmand selection to plant in Autumn. For best result, sow seeds directly into containers or into your garden. Make sure that the soil is prepared, stones were already removed and un-decompose matters, well-drained, fertilize and not watery. Do not put fresh manure as this will result to rotting of the roots. Make a straight shallow drill measuring half an inch in depth. If it's dry, water the drill well before sowing. Sprinkle the seeds along thinly by pinching seeds from the palm of your hand. You can leave 6" between rows. Water as needed to keep the soil moist. Carrots can be eaten raw or cooked.
Harvesting
Ready to harvest in about 3 months when roots reaches up to 25-30cm long & 5-8cm in diameter. Pull them out by holding the stem or using fork or shovel. Be careful not to damage the carrots as they will get rotten easily when wounded. Rinse them thoroughly and place them in refrigerator or you can leave them in a cool area to store up to a month.
Cauliflower Mini
Growing/Eating
Cauliflower Mini White is a fast maturing variety producing small pure white heads that are the perfect size for small gardens. It is a good source of vitamin C as well as other vitamins and minerals. Cauli need rich, deep soil and need plenty of watering, especially in summer, but they can be grown all year round. You can plant them directly into their seedbed or start seedlings indoor first. Transplant seedlings once they have 5-6 leaves. Plant them by rows or groups/blocks with space 60cm/2ft apart. Look out for weeds and pests, such as aphids, slugs and snails. Take care not to over-expose the cauliflower's curd to sunlight – snap some of the outer leaves to shade it if necessary. Best cooked rapidly, both to prevent the cauliflower smell filling the house and to retain its firmness, or consider roasting it. Cauliflower is also good raw in a salad.
Harvesting
Harvest When the curds are developed, but before they begin to open out and divide. It usually takes around 4 months for a cauliflower to reach maturity. Heads bigger than 8" may discolor and lose their firmness. Cut them in the morning while there is still dew on them, but in frosty weather leave till midday, if you want to keep them for up to 3 weeks before use dig up the whole plant shake off any soil off the roots and hang upside down in a cool shed, mist the heads occasionally. To store cauliflower in the fridge for a couple of weeks, wrap tightly in cling film; they can be frozen, but tend to become a little mushy.
Cauliflower Sicily Purple
Growing/Eating
Insect-resistant variety that is easier to grow and it is considered to be an herb as it is rich in antioxidants that fight cancer. Great veggie selection to sow during Autumn to mid-summer. Start planting Cauliflower seeds indoor 1-2 months before the last frost. When the full cauliflower seeds sprout, you can thin any extra seedlings by snipping the stalk close to the ground. You don't need to pull it out because it could disrupt the roots of the cauliflower plant that you are keeping. If the plants reach about 6 inches tall, plant them in your garden. Make sure not to cover the bottom leaves. Cover the developing heads with the leaves, loosely tying them in place with string to prevent the bright purple heads from fading in the sun. The heads cook turn to bright green.
Harvesting
Best time to harvest Cauliflowers is when the heads are tight and full with smooth curds. Make sure to harvest them before the different sections of cauliflower begin to separate. It will take 15-17 weeks from sowing to harvest. Cut stalk below head with a knife. Side shoots may produce second crops and it usually occurs after harvesting the main head.
Celery Dorata Dásti
Growing/Eating
Perfect timing to plant Celery Dorata Dasti is during autumn-spring. Best choice for gardeners who love leafy-greens and for those who want quick harvest. Plant them in full sun position with the height and spacing 50cmx0cm. It requires consistently moist soil, therefore do not let the soil becomes dry. This veggie is crispier and juicy and great for salads, stir-fry and steaming.
Harvesting
It takes 15 weeks to harvest from sowing. Cut the stalk of Celery below the heads with a knife and remove the old leaves. Rinse it thoroughly and then put it in a plastic bag if you store it in refrigerator.
Celery Stringless
Growing/Eating
This variety belongs to biennial crops, means this plant matures and completes its life cycle over the course of two year. Prepare the beds by adding plenty of compost and manure. Plant Celery Stingless seed in an area where it has full sun exposure. Try to ensure a gap of at least 0.99 inches when sowing to prevent overcrowding your seedlings. This plant requires a regular fertilization so they will grow quickly and not become tough and stingy. Remember to water it adequately. Celery is best for making soups, puree and salads.
Harvesting
To harvest Celery look for uniformly green stalks. Pale green stemmed Celery produces thick, crunchy, and string less sticks. Slowly dig down the soil with the use of shovel; carefully remove it by avoiding damage to the entire plant. Remove the excess soil and root through washing. Roots are also good for making soups. Celery that is going to produce seed has stingy roots, so avoid them.
Chia
Growing/Eating
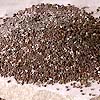
Chia plant does best in low-moisture areas, and the danger for this plant is over watering because when the seeds get wet it becomes slippery and hard to handle. So seeds must be carefully stored and kept dry. For this reason, chia seeds are planted away from lawns and other thirsty plant. To facilitate planting, scatter the seed over the soil and rake lightly. This plant does best in light, absorbent and porous soil and must be transplanted to an area that gets lot of sun. Chia is a self sowing plant for its seeds naturally drop off the plant, and grow into new one if not eaten by birds or mice. Best gourmand choice to add in your garden that will produce a bountiful harvest. Used Chia as toppings and add them in traditional recipes. Chia seeds can be mixed with nutritious liquids and consumed quickly for a healthy sports drink or breakfast shake.
Harvesting
See if the bloom fades, dry and turn yellow. Harvest can be started right after the bloom has dried but before the seeds have fallen on their own, since this plant has known to be self planting. Cut off the flower stalks with a pair of clean gardening shears 1 inch above the soil level and let the seeds fall into the container by beating off the dried flower bloom against the inside edge or pound on the stalks with a wood spoon or spatula to release the seeds. This is the simplest way to harvest the seed to prevent the self planting process.
Chick Peas
Growing/Eating
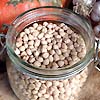
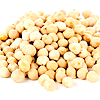
There are few things to consider in planting chick peas seeds since this needs a long growing season. This plant requires full sun exposure even if it can grow to a relatively cool weather and a well-drained and fertile soil. Chickpeas don't really work well if transplanted. You can use paper or peat pots that can be planted whole without pulling on the delicate roots. The plant will grow fine in a container at least 10 inches across and deep. Keep exposing to sunlight and keep the soil moist until sprout can be seen. Mature Chick peas can be eaten in cold salads, cooked in stews, ground into flour, ground and shaped in balls and can be stirred into a batter and baked. A good gourmand choice to select for your garden.
Harvesting
Chick peas can grow 1-inch long pods and each one has one or two beans inside. It is more common to harvest as a dried bean crop, though it can be picked while still immature and green. Harvest the dried chick peas when the leaves have withered and turned brown. Find a flat and warm surface and place the plant and allow the pods to dry. Collect the seeds when the pods split.
Chicory Italian Mix
Growing/Eating
Italian Chicory is one of the best choices to plant with your green leafy vegetables. It is a gourmet type of vegetable that grows best in cool weather. It needs direct sun, but will tolerate partial shade, especially during the warmest part of the day. The soil must be fertile and well drained. Compost and fertilizer can be used before planting. When the soil is ready, directly sow the seed. Or can be started indoor transplants four to six weeks before planting outdoors. Cover seeds lightly with 1/8" or less of fine garden or seed starting soil. Seeds sprout in 7-14 days.
Pull out weeds when needed. Insects and disease problem in Chicory is uncommon due to its bitter taste and insects do not like it. It is mildly bitter when allowed to mature in cool weather and strongly bitter taste if it matures in the summer. Use it in gourmet salads classically served with a blue cheese and nutty vinaigrette or eat raw with a little olive oil.
Harvesting
Chicory is ready for harvest in about 90 days. Choose to pick young, tender leaves. Larger leaves get tough and too bitter tasting. Eat the fresh or cooked like spinach. Simply cut the leaves with a knife or cut the entire heads when it is ready to harvest.
Chilli Helfire Mix
Growing/Eating
Best crop to plant during spring season. A better crop will be achieved by growing under glass, although they can be cultivated outside in the area where they can be exposed to sunlight directly. To start planting, provide a bag of potting compost and some kind of seed try, cell blocks, or jiffy pellets. Soak the seeds within five minutes and pop the seed in. Yet avoid over soaking the seedlings for it restrict the root to grow and could eventually kill the seedlings. Scatter the seeds unto the soil, until you will see small plants are coming out. Always kept well watered, this will help forming and developing the flowers, and swelling and ripening the fruit.
Harvesting
It's very easy to determine that the chilies are ready for harvest. It's when it reached full size, the pod should feel firm and look fairy glossy, if it is still feel soft to touch it is still immature. Green chilies may ripen to completely red after being picked. You can pick pods early but waiting for its maturity will give its best full flavor and heat.
Chilli Tobago Mix
Growing/Eating
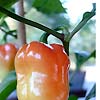
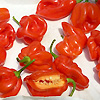
Plant Tobago Chilies in pots or an open area where they enjoy full sun. In the pot, dig up to 9 to 12 inches. As the summer intensifies, you may need to provide some shade. Maintain to keep the plants below 36°C, don't feed them a lot of nitrogen and don't let them dry out. That should help prevent blossom-drop and pod-drop. You may need support with a cane for larger varieties. If they are outside it is probably cold windy weather. If they are indoors it could be lack of humidity, in which case give them a mist spray. Lack of feed will also cause flowers to drop. Use it as a cook-in ingredient - intense seasoning - to spice-up soups, sauces, dressings.
Harvesting
Best time to harvest Chili Tobago Mix is when they reach to their full size. Some harvest it while it is still green, but some wait for it until it is already red, an indication that it is ripe already. When it goes red, it is as hot, but it goes sweeter, like the difference between a green and a red sweet pepper. Preserve chilies by freezing them whole.
Cucumber Lemon
Growing/Eating
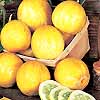
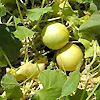
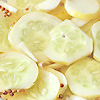
Start lemon cucumber seedlings inside 2 to 4 weeks before the last frost, or start them directly in the soil once the threat of frost passes. Use peat pots or pellets if you start seed indoors to avoid disturbing roots when transplanting. Planting outside should be delayed until the danger of frost has passed in the spring. Cucumber seeds can be planted directly in rows 2 to 3 feet apart with rows 5 to 6 feet apart. It can also be planted in hills consisting of four or five seeds per hill spaced at 4 to 5 feet apart. Lemon cucumbers need full sun, fertile and well-drained soil to avoid rotting of either the germinating seed or the roots, once the plants begin to develop. Water the lemon cucumber seeds every other day to maintain moisture to a depth of 1 inch. Avoid overwatering the seeds since they are prone to rotting. Cucumber Lemon is best when eaten raw.
Harvesting
Harvest the fruit once they turn a pale to medium-yellow shade and no longer have a greenish tinge near the stem. Usually it takes 50-70 days from planting. Cucumbers should not be allowed to reach the yellowish stage as they become bitter with size. Harvest by cutting the stem 1/4 inch above the fruit using knife. Don't trample the vines any more than necessary to harvest the crop.
Cucumber Mini White
Growing/Eating
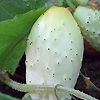
This type of vegetable grows annually and best choice to plant during spring. Let the plant grow in a full sun position during spring season. Dig up to 0.47 inches and a spacing of 11.7 inches for sowing. Make sure that soil is moist and well-drained, not soggy. Since cucumber is a climbing vine, you can put a trellis, cane or you can plant them near the fence directly. When they begin to flowers, you can spray vines with sugar water to attract bees to set more fruit. Remember to water often for best growth. Keep them weeded throughout the growing season. Use harvested cucumbers' in salads.
Harvesting
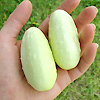
Mini white cucumber reaches its length about 6 inches. Do not wait until it reaches it's over size. Picking fruit early promote growing of new fruits. Any cucumbers left on the vine too long will turn yellow; get tough skins, and lower plant productivity. When picking, simply use your hand by pulling the ripe fruit away from its stem and prevent damaging the other fruit. Clean with water. Picked fruits are ready for cooking and some for storing.
Cucumber Parisian Pickling
Growing/Eating
Premium veggie selection for Spring-Summer season planting. Parisian cucumber needs a moderate amount of maintenance, so gardener's task is to insure the quality of the soil to produce healthy and fruitful planting crop. Prefer to plant them in a light sandy soil and not acidic. In planting, insure to have a full sun location as this plant love warm weather. You can plant seeds directly near trellis, fences or walls. If seedling it first, ensure not to disturb the roots for a healthier result. Remember to water appropriately for best growth. Cucumbers are usually grown for salads.
Harvesting
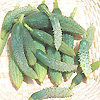
You can harvest Parisian in about 60 days. Pick fruits regularly twice or thrice a week, this helps the vine produce more fruits. In picking, simply pull out the ripe fruit with your hand. See to it that the direction in picking will prevent damaging the other fruits. Wash harvested fruits with water and store.
Cucumber Spacemaster
Growing/Eating
Spacemaster cucumber could be the most excellent selection for your garden as this variety tends to produce 25-30 fruits per plant. Allow to grow seeds on the ground, but in order to save garden space, let them grow in a cage or on trellis and let them have 1 foot spacing in between plants. Water appropriately. Make sure that the soil is fertile and well-drained. Cover with ½ inch of fine soil, lightly firm, and keep it moist. Train them to climb when they are about 1 ½ feet long. Use fruits in salads.
Harvesting
Pick fruits promptly when they are ripe to facilitate growth of new fruits. Don't wait until the cucumbers reach its supermarket size for they will not be in good taste. In picking, simply pull out the ripe fruit using your hand. Pull directly without damaging the other fruits. Rinse with water and ready for cooking or storing.
