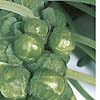
Selecting Veggies
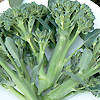
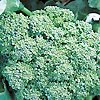
Baby Broccoli
Growing/Eating
Lovely and yummy Broccoli that you should have in your garden. This plant prefers temperate zones, it will become woody and bitter if the weather is too hot. Cold weather can also damage the plant. It requires more personal attentions in order for the plant to produce sweet, long and tender shoots. When planting, Space plants 12 to 24 inches apart.
Baby Broccoli can be eaten raw or cooked as it is extremely tender. In raw form, it is added to salads or paired dips. Cooked baby broccoli may be offered as a side, mixed in with quiche or included in omelets among many other uses. It contains high level of vitamins' A and C, iron, fiber and potassium.
Baby Broccoli can be eaten raw or cooked as it is extremely tender. In raw form, it is added to salads or paired dips. Cooked baby broccoli may be offered as a side, mixed in with quiche or included in omelets among many other uses. It contains high level of vitamins' A and C, iron, fiber and potassium.
Harvesting
Harvest broccoli when the buds of the head are firm and tight before the heads flower. Morning is the best time to harvest broccoli before the soil heats up for best taste. Cut the heads off from the plant at least 6 inches of stem. Store broccoli in the refrigerator for up to 5 days. If you wash before storing, make sure to dry it thoroughly. It can also be blanched and frozen for up to one year.
Baby Leaf Gormet Mix
Growing/Eating
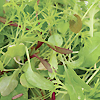
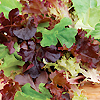
Lettuce Baby Leaf Mix is a mixture of red and green Romaine lettuces which perform well in cool temperatures and are an excellent choice for home gardens. Choose a sunny spot with good soil and drainage to plant. It is an advantage to box in the area so it is slightly raised. Dig the soil over thoroughly and incorporate compost, mushroom compost or well-rotted animal manure. Sow the seeds thickly 1/2" deep in warm soil about 4-6 seeds per square inch. This mix of tender baby leaves makes a surprisingly mild and balanced salad bowl. Baby Greens are generally high in iron, potassium, calcium, magnesium, arytenoids and vitamin contents.
Harvesting
Harvest by cutting leaves once they reach 4-5", for optimal flavor and a prolonged and prolific harvest. Use scissors to snip them off just above the growing crowns if you would like to be able to pick several times. Heat can cause wilting so harvest must be done early in the morning before the sun is high.
Once you've harvested, rinse the leaves in cold water and drain on towels or pat dry to remove any dust or dirt. Remove any leaves with slimy, brown or yellow spots. You can preserve it in refrigerator by wrapping the leaves in clean, damp cloth and then placing them in a plastic bag to ensure a longest lasting, crispiest lettuce.
Once you've harvested, rinse the leaves in cold water and drain on towels or pat dry to remove any dust or dirt. Remove any leaves with slimy, brown or yellow spots. You can preserve it in refrigerator by wrapping the leaves in clean, damp cloth and then placing them in a plastic bag to ensure a longest lasting, crispiest lettuce.
Bean Blue Lake Climbing
Growing/Eating
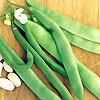
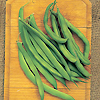
Best selection to add fence covering in your garden as by nature, these plants love to climb and they will need support. They should be planted in warm areas and after all danger of frost is past as they are sensitive to cold temperature and frost. Plant the seeds 5 cm deep and 25 cm apart and remember to water well to keep the soil moist. Protect young plants from slugs and support with hazel wigwams, cane, netting or trellis. You can also plant them by rows and in containers. This bean produce delicious, tender, white seeded pods. Younger beans can be sliced and enjoyed raw or cooked, mature white seeds can be dried and used like haricot beans.
Harvesting
You can have your harvest when the pods are firm, tender, crisp and fully elongated, but before the seed within the pod has developed significantly. Pick beans after the dew is off the plants, and they are thoroughly dry. Picking beans from wet plants can spread bean bacterial blight, a disease that seriously damages the plants. Be careful not to break the stems or branches, which are brittle on most bean varieties. Always prefer to use scissors. The bean plant continues to form new flowers and produces more for up to 4- 7 weeks.
Bean Flageolet Flagrano
Growing/Eating
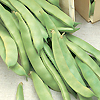
A French flageolet-type bean which is more alike to peas. Best gourmand option for planting in your garden during spring season. Sow them in a position that is prone to sunlight. Plant seeds in line, 3 to 4 cm between seeds, 40 cm between rows or in groups of 3 to 6 seeds spaced 30 to 40 cm apart. Optimum sowing rate: 100 seeds per 10 m row. Applying well rotted manure or compost is necessary in growing Bean Flageolet. They produce much harvest if they are cared properly. Water the plants regularly to keep the soil moist but do not over wet the soil. The flageolet has an inedible green pod about 3-inch long and small, light-green, kidney-shaped seeds. They range from creamy white to light green. Best known for French cooking and is good for making soup.
Harvesting
It usually takes about 9 weeks to start harvesting your Flageolet beans. Young pods can be picked and can be eaten fresh either the whole pods or shelled seeds. The seeds can also be dried. Pick the pods directly from the bushes when they begun to dry and change colour. Avoid picking them when they are wet or during wet season to prevent disease to be carried to another plant. Keep the seeds in a cool dry place. Storing them in a tightly close glass is more recommended.
Bean Haricot
Growing/Eating
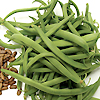
Growing haricot beans is best in an open, sunny place with good drainage, moisture retentive but not soggy area and well prepared soil. Dig plenty of well rooted-manure, compost or leaf-mould into the soil to improve moisture retention and improve fertility. Beans are nitrogen fixers, so they will enrich the soil that they are planted in. Best choice for gardeners who love growing beans as this is very easy to grow and fast crop producer.
Plant out directly 23cm (9in) apart in a single row with rows 45cm (18in) apart. You can also plant them in a patch and arrange them to make a line. Provide stakes to support the plant as they grow. When seedlings appear, thin them out so that the bean plants will not be crowded and keep the soil well-watered. Loosely tie the plants to the supports when they grow up and then they will climb unaided. These beans are delicious in salads, stews, and Tuscan bean and pasta soup.
Plant out directly 23cm (9in) apart in a single row with rows 45cm (18in) apart. You can also plant them in a patch and arrange them to make a line. Provide stakes to support the plant as they grow. When seedlings appear, thin them out so that the bean plants will not be crowded and keep the soil well-watered. Loosely tie the plants to the supports when they grow up and then they will climb unaided. These beans are delicious in salads, stews, and Tuscan bean and pasta soup.
Harvesting
This bean is basically grown for its ripe seeds and seeds are collected when the pods have become brittle. Seeds are white with red flecking and used either at the mature, green stage or as dried beans. It can be kept for up to a year or more if stored in cool dry place out of sunlight. It is best stored in a glass or plastic container with a tight-fitting lid.
Bean Italian Romano
Growing/Eating
Italian Roman Bean is quite easy to grow and is fairly low in maintenance. This gourmand choice can be planted in full sun 4-6" apart with 24" between the rows at the base of poles, trellis, a fence or a Bean Tower. For quicker germination, soak the seeds in lukewarm water for three hours.
For best result, water the beans once or twice a week during hot, dry summer weather. This plant enjoys medium-level watering which keeps the soil moist, but not wet. Seeds will rot in the ground in cold, damp weather. Fertilize the beans once every two to three weeks. Remember to direct sow your bean seed. Transplants don't work very well. Italian Romano has a meaty texture that makes them ideal for a side dish, blanching and steaming.
For best result, water the beans once or twice a week during hot, dry summer weather. This plant enjoys medium-level watering which keeps the soil moist, but not wet. Seeds will rot in the ground in cold, damp weather. Fertilize the beans once every two to three weeks. Remember to direct sow your bean seed. Transplants don't work very well. Italian Romano has a meaty texture that makes them ideal for a side dish, blanching and steaming.
Harvesting
Pick the beans while they are still tender, being careful not to break off branches or uproot the plant. This bean usually matures and become tender in 50-60 days. For dry beans it takes up to 100+ days. To avoid damaging the plant always harvest beans by cutting their pods off with scissors. Pick your beans frequently as it encourages flowering. Beans should be stored in paper bags and used within a few days for best results. Cut the beans off at the ground when they are on their last legs leaving their nitrogen fixed roots in the soil.
Bean Stringless Pioneer
Growing/Eating
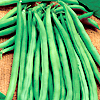
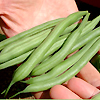
This variety is succulent and disease resistant but will not tolerate wind, heat with low humidity, or low temperatures. It will result into poor growth, dropping of blossoms, poor pod-set and hollow, short and deformed pods. Most beans need well drained deep friable self-mulching loams, sands or peat soils, containing ample organic matter. The seed bed must be firm and have a crumbly surface; it must be moist but not too wet Plant in double rows 8-12" apart. Space double rows 24-30" (61-76cm) apart. Enjoy in the garden, with dips or snapped into pieces and mixed with salads. Also delicious steamed, stir-fried or shelled.
Harvesting
Harvest starts after 9 weeks from sowing. Pick the young beans regularly as it helps the plant to produce more pods for over two months. Be careful not to damage flowers. This bean can also be dried, wait for the pods to mature in the bush, when the color changes, before picking it.
Beetroot Bull's Blood
Growing/Eating
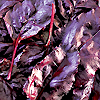
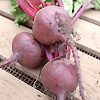
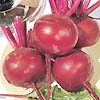
LBeetroot grows best in cool weather and full sun or partial shade. It likes rich, light and moist soil and needs extra water during dry periods to reduce the likelihood of bolting. This variety is primarily grown for its tender, sweet, deep red-burgundy foliage, and both leaves and beetroots can be eaten. Beets are tasty when harvested at the 2- to 3-inch size. It typically forms a dense rosette of metallic, dark purplish-red leaves that grow in a clump to 18" tall (sometimes more).
Direct seeding in the garden is the easiest way to grow beets. Soak seeds for 8 to 24 hours before sowing to hasten its germination. Plant seeds 1/2-inch deep, 2 inches apart if growing for greens, 3 to 4 inches apart if growing for the roots. As the beets grow, keep thinning them by pulling up every other one until there is only one plant every 3 inches. Cook the removed beet seedlings or eat them in salads. Leaves are best for salads and or cooked vegetable.
Direct seeding in the garden is the easiest way to grow beets. Soak seeds for 8 to 24 hours before sowing to hasten its germination. Plant seeds 1/2-inch deep, 2 inches apart if growing for greens, 3 to 4 inches apart if growing for the roots. As the beets grow, keep thinning them by pulling up every other one until there is only one plant every 3 inches. Cook the removed beet seedlings or eat them in salads. Leaves are best for salads and or cooked vegetable.
Harvesting
The small sweet red roots are best when harvested young while the medium-sized spherical roots are tender and have a great flavor. Larger beets are not considered fit for culinary use. Leaves can be harvested as early as one month after planting up to 35 days. When harvesting the leaves, use scissors so as not to dislodge the plant and cut them without too much stalk, as the stalk remains tough and mostly inedible.
Beetroot Burpees Golden
Growing/Eating
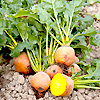
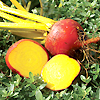
Golden Burpee's is a globe-rooted beetroot with distinctive gold-yellow flesh and a golden-orange skin colour. An excellent gourmand choice for its sweet-tasting and brilliant-looking organic beetroot, it's fantastic for mixing with the purple in a salad. For best planting result, prepare a shallow drill 1cm deep in a weed free, sunny position in fertile, light, well drained soil and sow the large easy-to-handle seeds about 15cm apart. Cover again lightly with soil and water in. Seeds produce multiple seedlings so thin to leave one plant to mature at each spot. Water regularly in hot dry weather to keep roots sweet and stop them going 'woody'. You can have larger globes by thinning the rows as they grow and also to give more space to the remaining ones. Beetroot can also be grown in containers. Sow directly into the compost allowing about five seeds to a 45cm pot.
Harvesting
Harvest when the globes are about 5cm in diameter, about golf-ball size. Do not let the beetroot get too big as this will reduce taste and quality. Beets are suited to long-term storage if kept at temperatures near freezing and with high humidity to prevent wilting. Tops can be eaten at 5-8cm tall in salads and also good for steaming.
Beetroot Globe
Growing/Eating
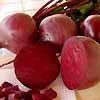
Beetroots is a cool weather vegetable crop and will grow any time of the year as long as the moisture content of the garden soil is kept constant. Beetroots are not sensitive to heat; they are resistant to cold but will grow at a slower rate during winter. It also does well in garden soil where Brassicas such as cabbages or Brussels sprouts have been cultivated and are ideal for crop rotation with these crops. Prepare the soil by working in the compost, removing stones and pebbles and wetting it thoroughly. Allow the garden soil to stand for a day or two. Then ensure that the soil is evenly moist by checking it with a garden fork. Hard compacted soil like clayey soil should be avoided since it will hamper root development.
During seedling, make a 2cm deep trench with the corner of a rake or a cane will do, and drop in seeds every 10cm. Two seeds can be sown together if you want a strong row without breaks. Cover, water well and label - when the seedlings are about 2cm high, remove the weakest of each pair to leave one beetroot seedling every 10cm. When thinning, thin the growing beets to spaces of 2 inches as early as possible so it will produce 3 to 5 plants in a tight clump. After growing beets, serving ideas include to serve hot, cooked, sliced beets in an orange sauce or with dollops of sour cream. Beets also make a great flavor and color addition to soups such as borscht, and stews.
During seedling, make a 2cm deep trench with the corner of a rake or a cane will do, and drop in seeds every 10cm. Two seeds can be sown together if you want a strong row without breaks. Cover, water well and label - when the seedlings are about 2cm high, remove the weakest of each pair to leave one beetroot seedling every 10cm. When thinning, thin the growing beets to spaces of 2 inches as early as possible so it will produce 3 to 5 plants in a tight clump. After growing beets, serving ideas include to serve hot, cooked, sliced beets in an orange sauce or with dollops of sour cream. Beets also make a great flavor and color addition to soups such as borscht, and stews.
Harvesting
To harvest, gently hold the tops and lift while levering under the root with a hand fork. Any attempt to wrench the plant directly out of the ground will likely result in an undesired result. Separate the green tops from the roots leaving an inch of stem on the beet. Beets may be stored in a polyethylene bag in a refrigerator for several weeks.
Remove the tops by twisting them off with your hands to prevent the plants bleeding their juice - don't throw these away, they have bags of taste and can be cooked and eaten like spinach, and are very tasty in a stir-fry.
Beetroot Heirloom Mix
Growing/Eating
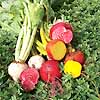
Beetroot heirloom mix includes Chioggia, Bulls Blood, Golden and White Blankoma. Beets are usually grown for their leaves and roots. Plant beets seeds directly in the garden or containers with at least 8 inches deep one month before your last spring frost date. It should be planted one inch deep, and approximately three inches apart. Beets do well in well-drained, rich soil, and in an area that has full sun but they will tolerate partial shade. Keep the soil moist by watering regularly especially if the weather is too hot and the soil becomes dry as it results to tough and woody roots. Baby leaves and beets can be eaten raw, steamed and cooked.
Harvesting
You can harvest the greens once they're three inches high as long as you make sure to leave about 2/3 of the leaves on each beet root -- they need those leaves for photosynthesis. You can harvest baby beets as soon as the roots are an inch in diameter usually 8 weeks from planting or left to grow as large as you'd like them. Gently pull the beetroots from the soil or use fork or shovel. Make sure that you do not damage the root crown in any way as this will cause the root to bleed and loss of color will result.
Broad Bean Aquadulce
Growing/Eating
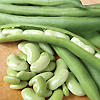
Broad Bean Aquadulce produces glossy plump bean pods that are about 23cm long. Grow beans in Autumn either in containers or direct in the ground about 5cm deep and 20cm apart with a gap of 60cm between each double row. Choose an open sunny site on ground which has been previously well-dug and composted and well-drained soil. Aquadulce tolerates most soil types so long as they are not water-logged. Place netting or a cane at the end of the double row and run a string round the plants for support. When preparing, simply shell and cook the beans and serve with a parsley sauce or gravy or mashed with garlic & served on a thin French toast with a drizzle of olive oil. This type of bean is excellent choice to plant as this is rich in protein, fiber and vitamin A, C, and E.
Harvesting
For the best flavor, pick the beans when they are starting to show through the pod while the scar on the end of the beans is still white or green. Remove the pods from the bush by twisting them in a downward direction. Harvest 2-3 times a week to encourage the plant to produce more crops up to 4-6 weeks. When picking pods to shell, wait until the beans can be seen through the pod. Do not leave them too long as once the scar on the bean turns black, the beans start becoming tougher.
Broccoli Green Sprouting
Growing/Eating
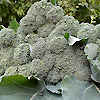
This is an excellent autumn crop for cold climates that can be used either fresh or frozen. Very easy to grow, plants grow erect and leafy: 30-36" in height. Matures in approximately 60 to 80 days. Broccoli prefers well drained fertile soils high in organic matter. It will tolerate slightly alkaline soil. It is also a very disease resistant, very hardy and very prolific producer of large dark green heads. If soils are heavy or tend to be wet, a raised bed is recommended.
If you plant in rows, start seed indoors about 4 weeks before transplanting outdoors, or direct seed outdoors using season extenders such as wall-o-waters for protection. If containers, allow 18" to 24" between each plant and seed thinly using row cover for protection if in bed planting. When transplanting, protect transplants from hard frosts with newspapers, plastic cones, paper bags, or baskets. Provide a windbreak to reduce transplant shock and moisture loss. Use wide spacing if you want to harvest large central heads. Closer spacing will produce smaller central heads. But if you harvest secondary heads you will get a greater total yield from the closer spacing. Flavor improves with cooler temperatures. Use shade fabric to extend summer harvests. Broccoli can be boiled, steamed or stir-fried.
If you plant in rows, start seed indoors about 4 weeks before transplanting outdoors, or direct seed outdoors using season extenders such as wall-o-waters for protection. If containers, allow 18" to 24" between each plant and seed thinly using row cover for protection if in bed planting. When transplanting, protect transplants from hard frosts with newspapers, plastic cones, paper bags, or baskets. Provide a windbreak to reduce transplant shock and moisture loss. Use wide spacing if you want to harvest large central heads. Closer spacing will produce smaller central heads. But if you harvest secondary heads you will get a greater total yield from the closer spacing. Flavor improves with cooler temperatures. Use shade fabric to extend summer harvests. Broccoli can be boiled, steamed or stir-fried.
Harvesting
Harvest for peak quality when the buds of the head are firm and tight usually about ten to twelve weeks after sowing, or a bit longer later in the year. If buds start to separate and the yellow petals inside start to show, harvest immediately. Pick the main bud by cutting it but leave the plant in the ground. Very often, several smaller side-buds will then form and can be picked a few weeks later.
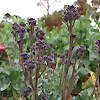
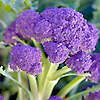
Broccoli Purple Sprouting
Growing/Eating
Sprouting Purple Broccoli is an excellent veggie choice to plant and it grows best in partial-shade, in firm, fertile, free-draining but water-retentive soil. Shallow, sandy soils, soil that is too acidic and exposed sites is not advisable for this plant. It should be protected from cabbage white butterflies laying eggs on them and any insects with slug pellets or barriers by covering it with netting and also to protect it from wind rock.
Prepare your seedbed well after your area's last frost date. Apply a layer of mature compost to the surface of the soil. Rake the compost into the soil and dig a long furrow in the seedbed. If you want multiple rows, dig furrows at least 36 inches apart. Plant each purple sprouting broccoli seed 1/2 inch deep and at least 12 inches apart. Tread on the soil to remove any air pockets and make the surface very firm. Water deeply when the soil feels dry. Cover the soil with mulch, such as pine needles or wood chips, to conserve moisture. Steaming is best rather than boiling to keep their rich colour and vitamin count. Leaves also can be cooked and eaten as a winter green.
Harvesting
Harvest sprouting broccoli when the flower shoots are well developed but before the flowers have actually opened, about 220 days from the date of planting. Timing is important, as once in flower, the shoots are woody and tasteless. Cut the central spear with a sharp knife first as this encourages the side shoots to develop quickly. Don't strip plants entirely in one go as the cropping period can extend for up to eight weeks.
After this harvest, florets begin to grow on the side shoots. Pick the side-shoots regularly when about 10cm of the tender stem as well as some small tender leaves attached. Fresh florets will keep in the fridge for around a week but are also great frozen.
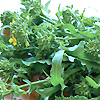
Broccoli Sessantina Grossa (Broccoli Rabe, Raab, Rapini, Rappone and Turnip broccoli)
Growing/Eating
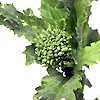
This variety produces thick, slightly bitter, tender shoots and buds that are excellent for pasta, sausages, side dressings and many more. This can be grown in all seasons throughout the year. Starts seedlings indoor, keep it until 6 weeks before transplanting to the ground. When the plants are almost half-grown it is important to side-dress with nitrogen fertilizer. The soil should always be ample moist especially when the florets are coming out. Organic mulch can be used in order to avoid the growth of weeds.
Harvesting
Ready for harvest when they reach a height of 10-15 inches about 10 weeks from planting. Flower buds, stems and leaves can be harvested gradually for continues period 2-4 weeks. Cut the small heads before the flower buds open. Pick them early in the morning for fresh and tastier result.
Brussel Sprouts Long Island Imperial
Growing/Eating
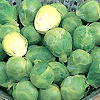
These crops thrive best in deep fertile loamy soils well supplied with organic matter. The soil should be well-drained and aerated for best results. As the vegetables are by nature cool season crops, they develop best yields and quality under cool, moist conditions such as usually prevails during the spring and autumn months. For an early crop start seeds indoors in earliest spring. Sow seeds in flats or individual peat pots, cover seed with 1/8 inch fine soil. For a later autumn-winter crop, sow seeds directly outdoors or start indoors by midsummer. When seedlings are 2 inches tall indoors, thin to 2 inches apart or transplant to individual pots. Transplant seedlings outdoors after hardening off, when danger of serious frost has passed. Most gardeners chose this plant primarily because of its delicious flavour.
Harvesting
Cabbage is harvested when the heads reach the size you desired. Harvest by cutting the head so that at least two wrapper leaves are present. Brussels sprouts harvest usually begins 3 - 3 1/2 months after setting the plants. Remove the leaf below the sprouts and carefully break the buds from the stem.
